
Solutions
How to Elevate Email Marketing and Create No-Code Custom Designs with BEE Pro and HubSpot
Email marketing allows sales and marketing teams to easily engage with customers, across all industries and organization sizes. With global email users estimated to grow to 4.6 billion users in 2025, it’s no surprise that email marketing still remains an extremely popular method for connecting with customers. It’s quick, affordable, and a great way to communicate with your audience, wherever they are.But email marketing doesn’t have to remain static. Responsive and intuitive email design infused with creativity and your unique brand helps pique your audience’s interest at just the right moment, encouraging them to engage.So how can companies improve their email marketing and design, while maintaining key workflows and minimizing tech burden?BEE Pro is a complete no-code email and landing page design suite for creating digital content quickly and efficiently, and it’s friendly to marketers, designers, and non-designers. With over 1,300 professionally designed email and page templates, teams of all sizes and design skill levels can drag and drop design elements in the easy-to-use editor.Collaborative design and marketing software helps teams get emails and landing pages out the door faster by centralizing the design process and giving all stakeholders — like marketers, designers, and copywriters — access to the same working file. With complete flexibility throughout the design process, content marketing teams can test designs, optimize, and figure out the best ways to connect with their target personas at scale.With the full support of BEE Pro’s content design suite as a HubSpot certified app, there is a seamless way to connect email and landing page designs to HubSpot, without losing any functionality. The BEE Pro Integration with HubSpot equips teams with smart design tools that allows them to quickly format emails as needed and easily export them right into HubSpot — keeping messaging and branding consistent throughout, and transferring contact data automatically.Here’s how companies, teams, and individuals in industries like HR, e-commerce, design, and education are using the BEE Pro Integration with HubSpot to create professional and dynamic email content to engage with their customers.
How design flexibility + collaboration allow more creative freedom for emails and landing pages
The BEE Pro Integration with HubSpot gives sales and marketing teams of all skill levels the ability to design emails and landing pages quickly. No matter your level of design skills, any user can create professional assets that are automatically linked to their contact database. Drag-and-drop modules are ideal for e-commerce, marketing, and sales emails, highlighting conversion elements.
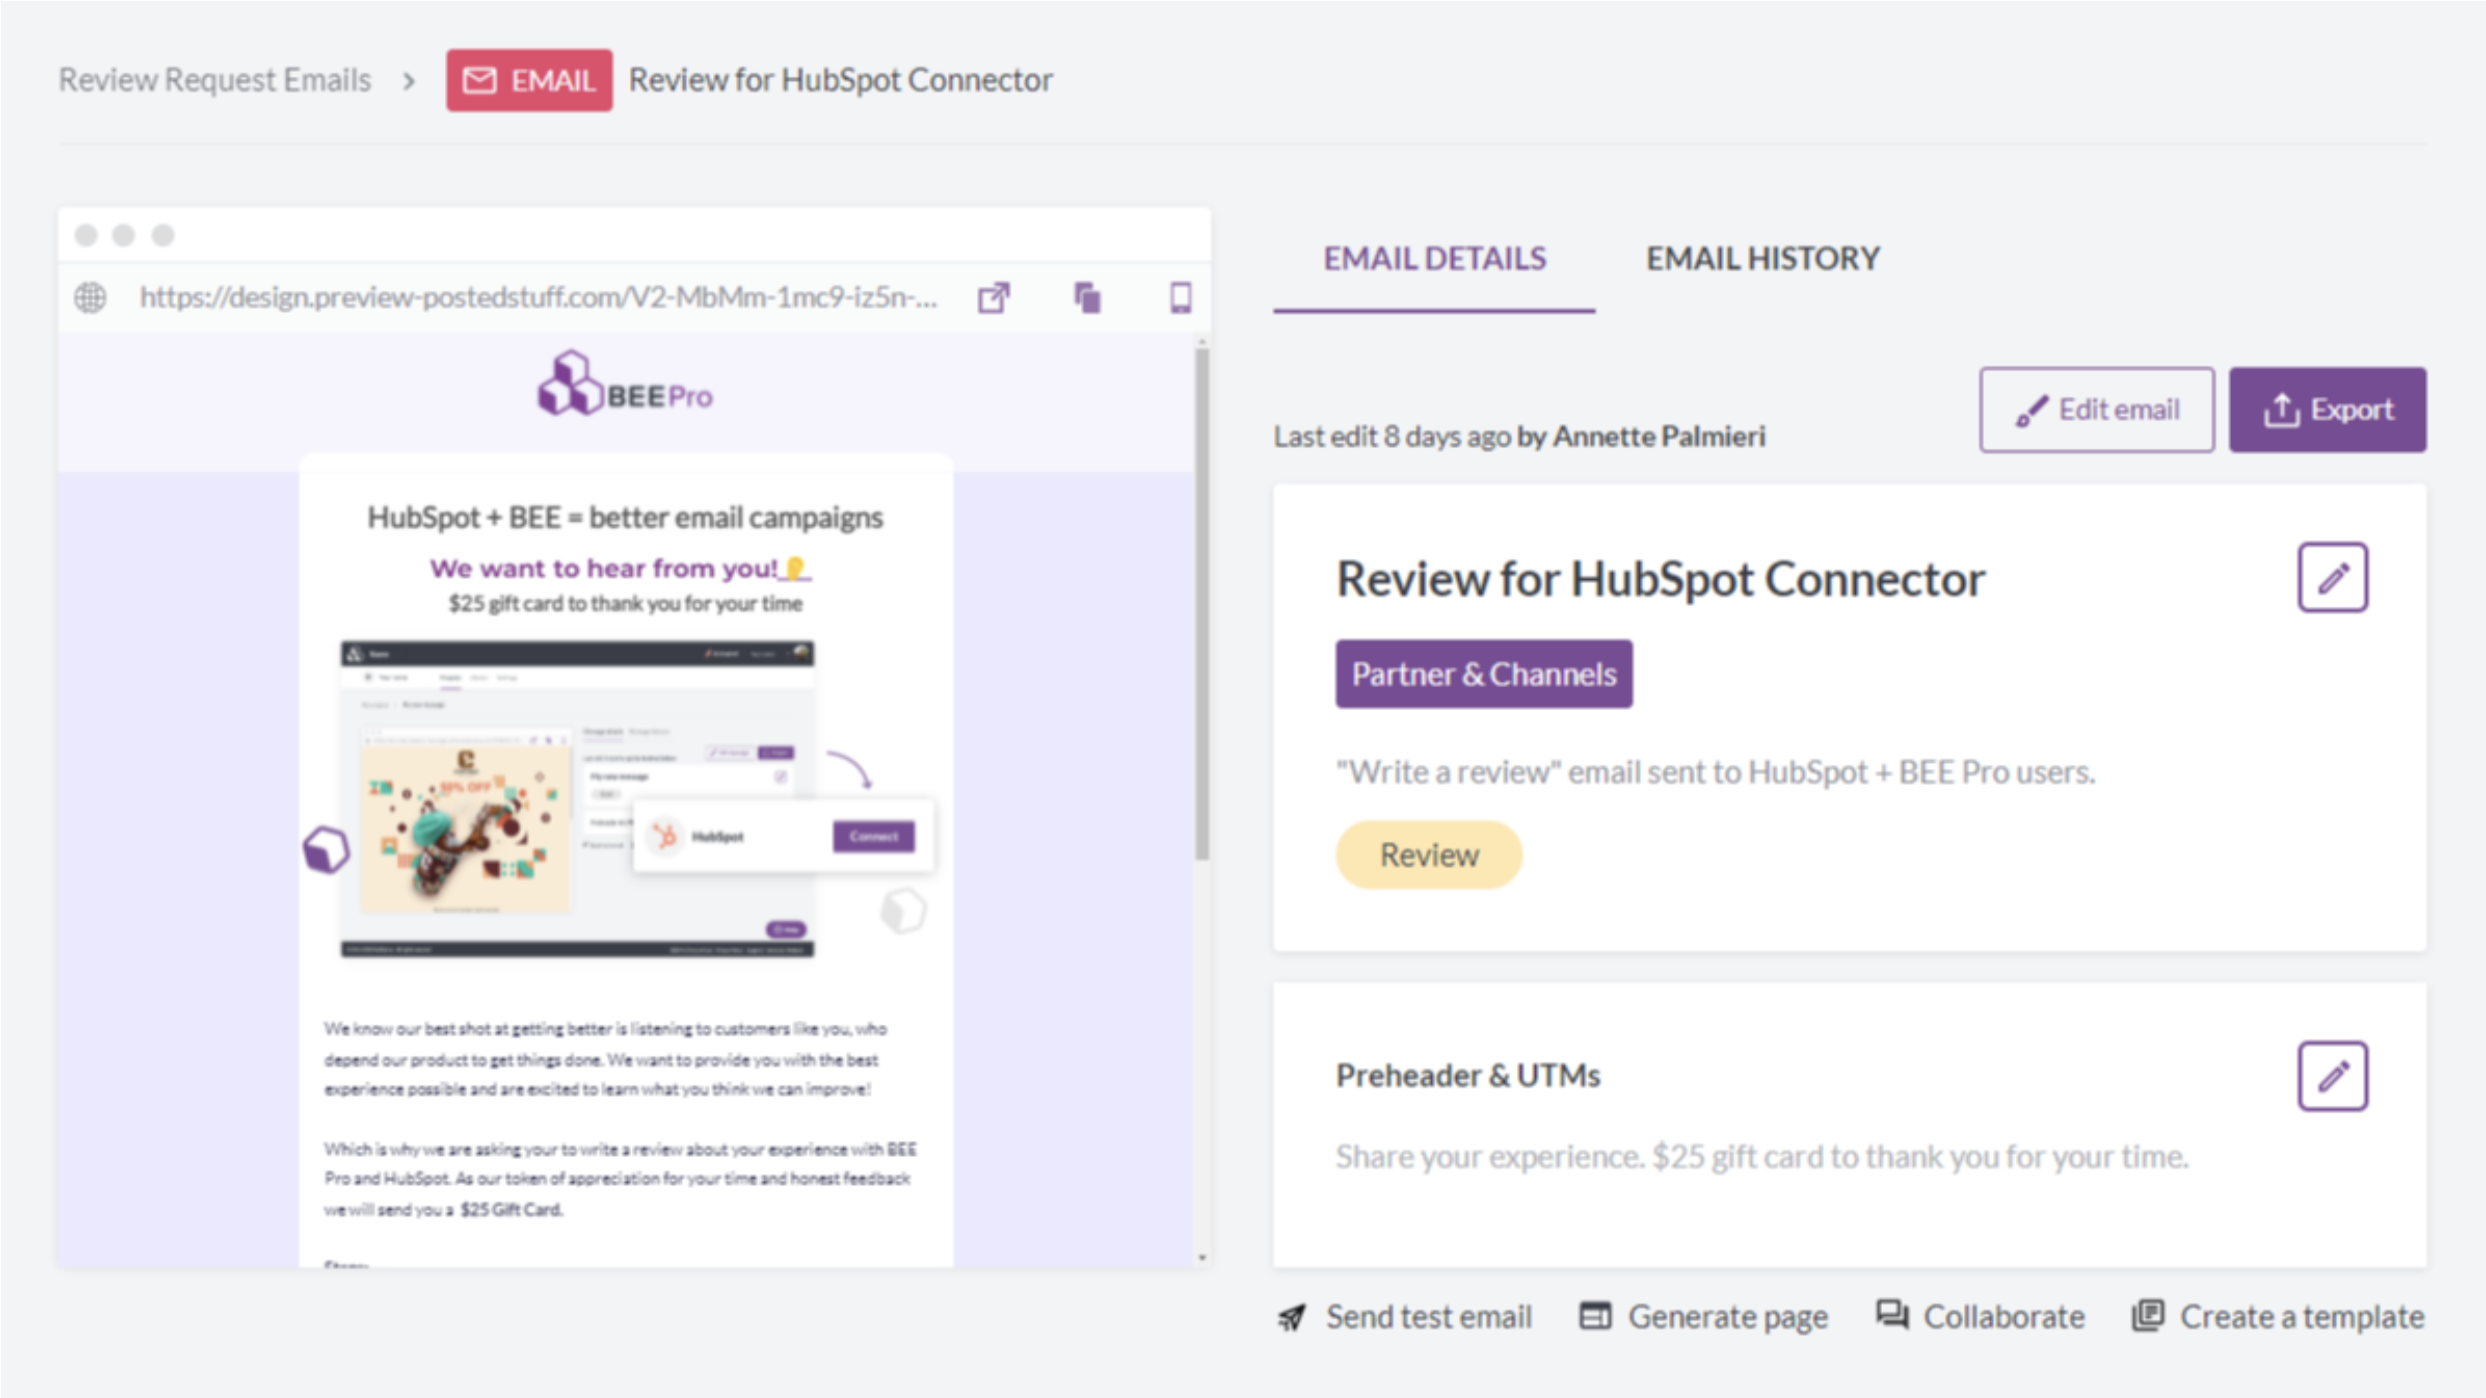
Here are a few ways using design tools with your CRM benefits sales and marketing teams by establishing creative freedom and enabling design collaboration.
Collaboration streamlines the design process
Collaboration is a core element of the BEE Pro and HubSpot integration. Whether you are an individual freelancer working with clients or a large organization that wants to empower entire teams, the collaboration tools allow all users to work together while minimizing back-and-forth. Users can add comments to any element found in an email or page and admins can set predefined roles for all users. The tool also supports brand consistency with custom colors, fonts, and other details for each brand or team.
Design flexibility can take an email to a landing page quickly
Teams can transform any email that has been created into a landing page with one click — allowing them to reuse existing content. This flexibility allows marketers to design full digital campaigns quickly and easily. They can also add page-specific content like signup forms, images, and videos (including video backgrounds) before the landing page is published to QA for consistency and conversion opportunities. If they start with a page, they can go the other way around, quickly transforming a landing page into an email that will drive traffic to it.
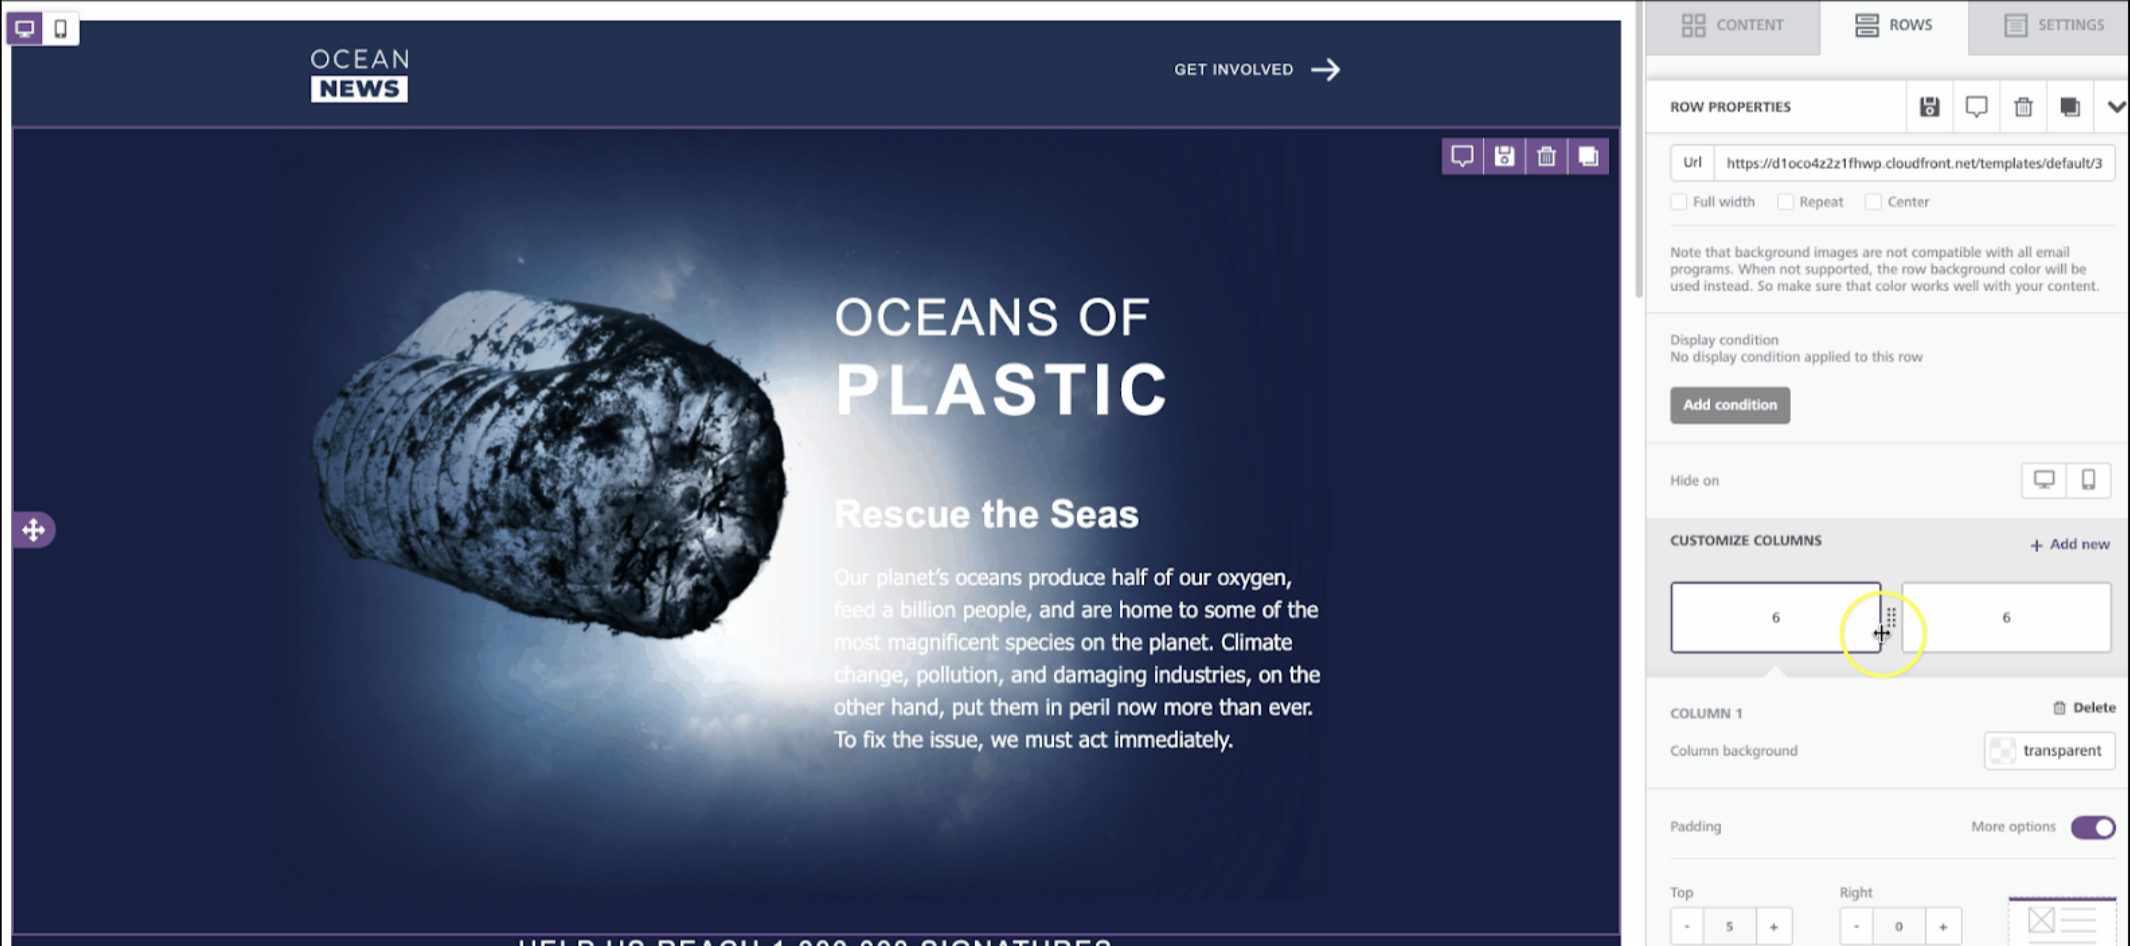
Mobile design mode keeps your email designs fully optimized
Mobile design mode allows teams to ensure that their email and page designs are fully optimized for mobile devices without needing to switch between the editor stage and preview mode. A quick toggle switches views and users can continue editing in both modes — guaranteeing that the design looks exactly as it should.
3 ways BEE Pro and HubSpot give teams more design freedom and responsiveness in marketing campaigns
Email and landing page design with BEE Pro and HubSpot gives sales and marketing teams the ability to customize email marketing and content campaigns, incorporating visual elements, CTAs, and more. With the BEE Pro design suite and visual editor, teams can design, create, and maintain their email templates and campaigns all in one location — cutting out unnecessary applications that can make the process clunky and time-consuming.Here’s how users can leverage BEE Pro and HubSpot to enable more design freedom in their content marketing campaigns and better engage their audiences.
- Build out attractive and responsive custom emails
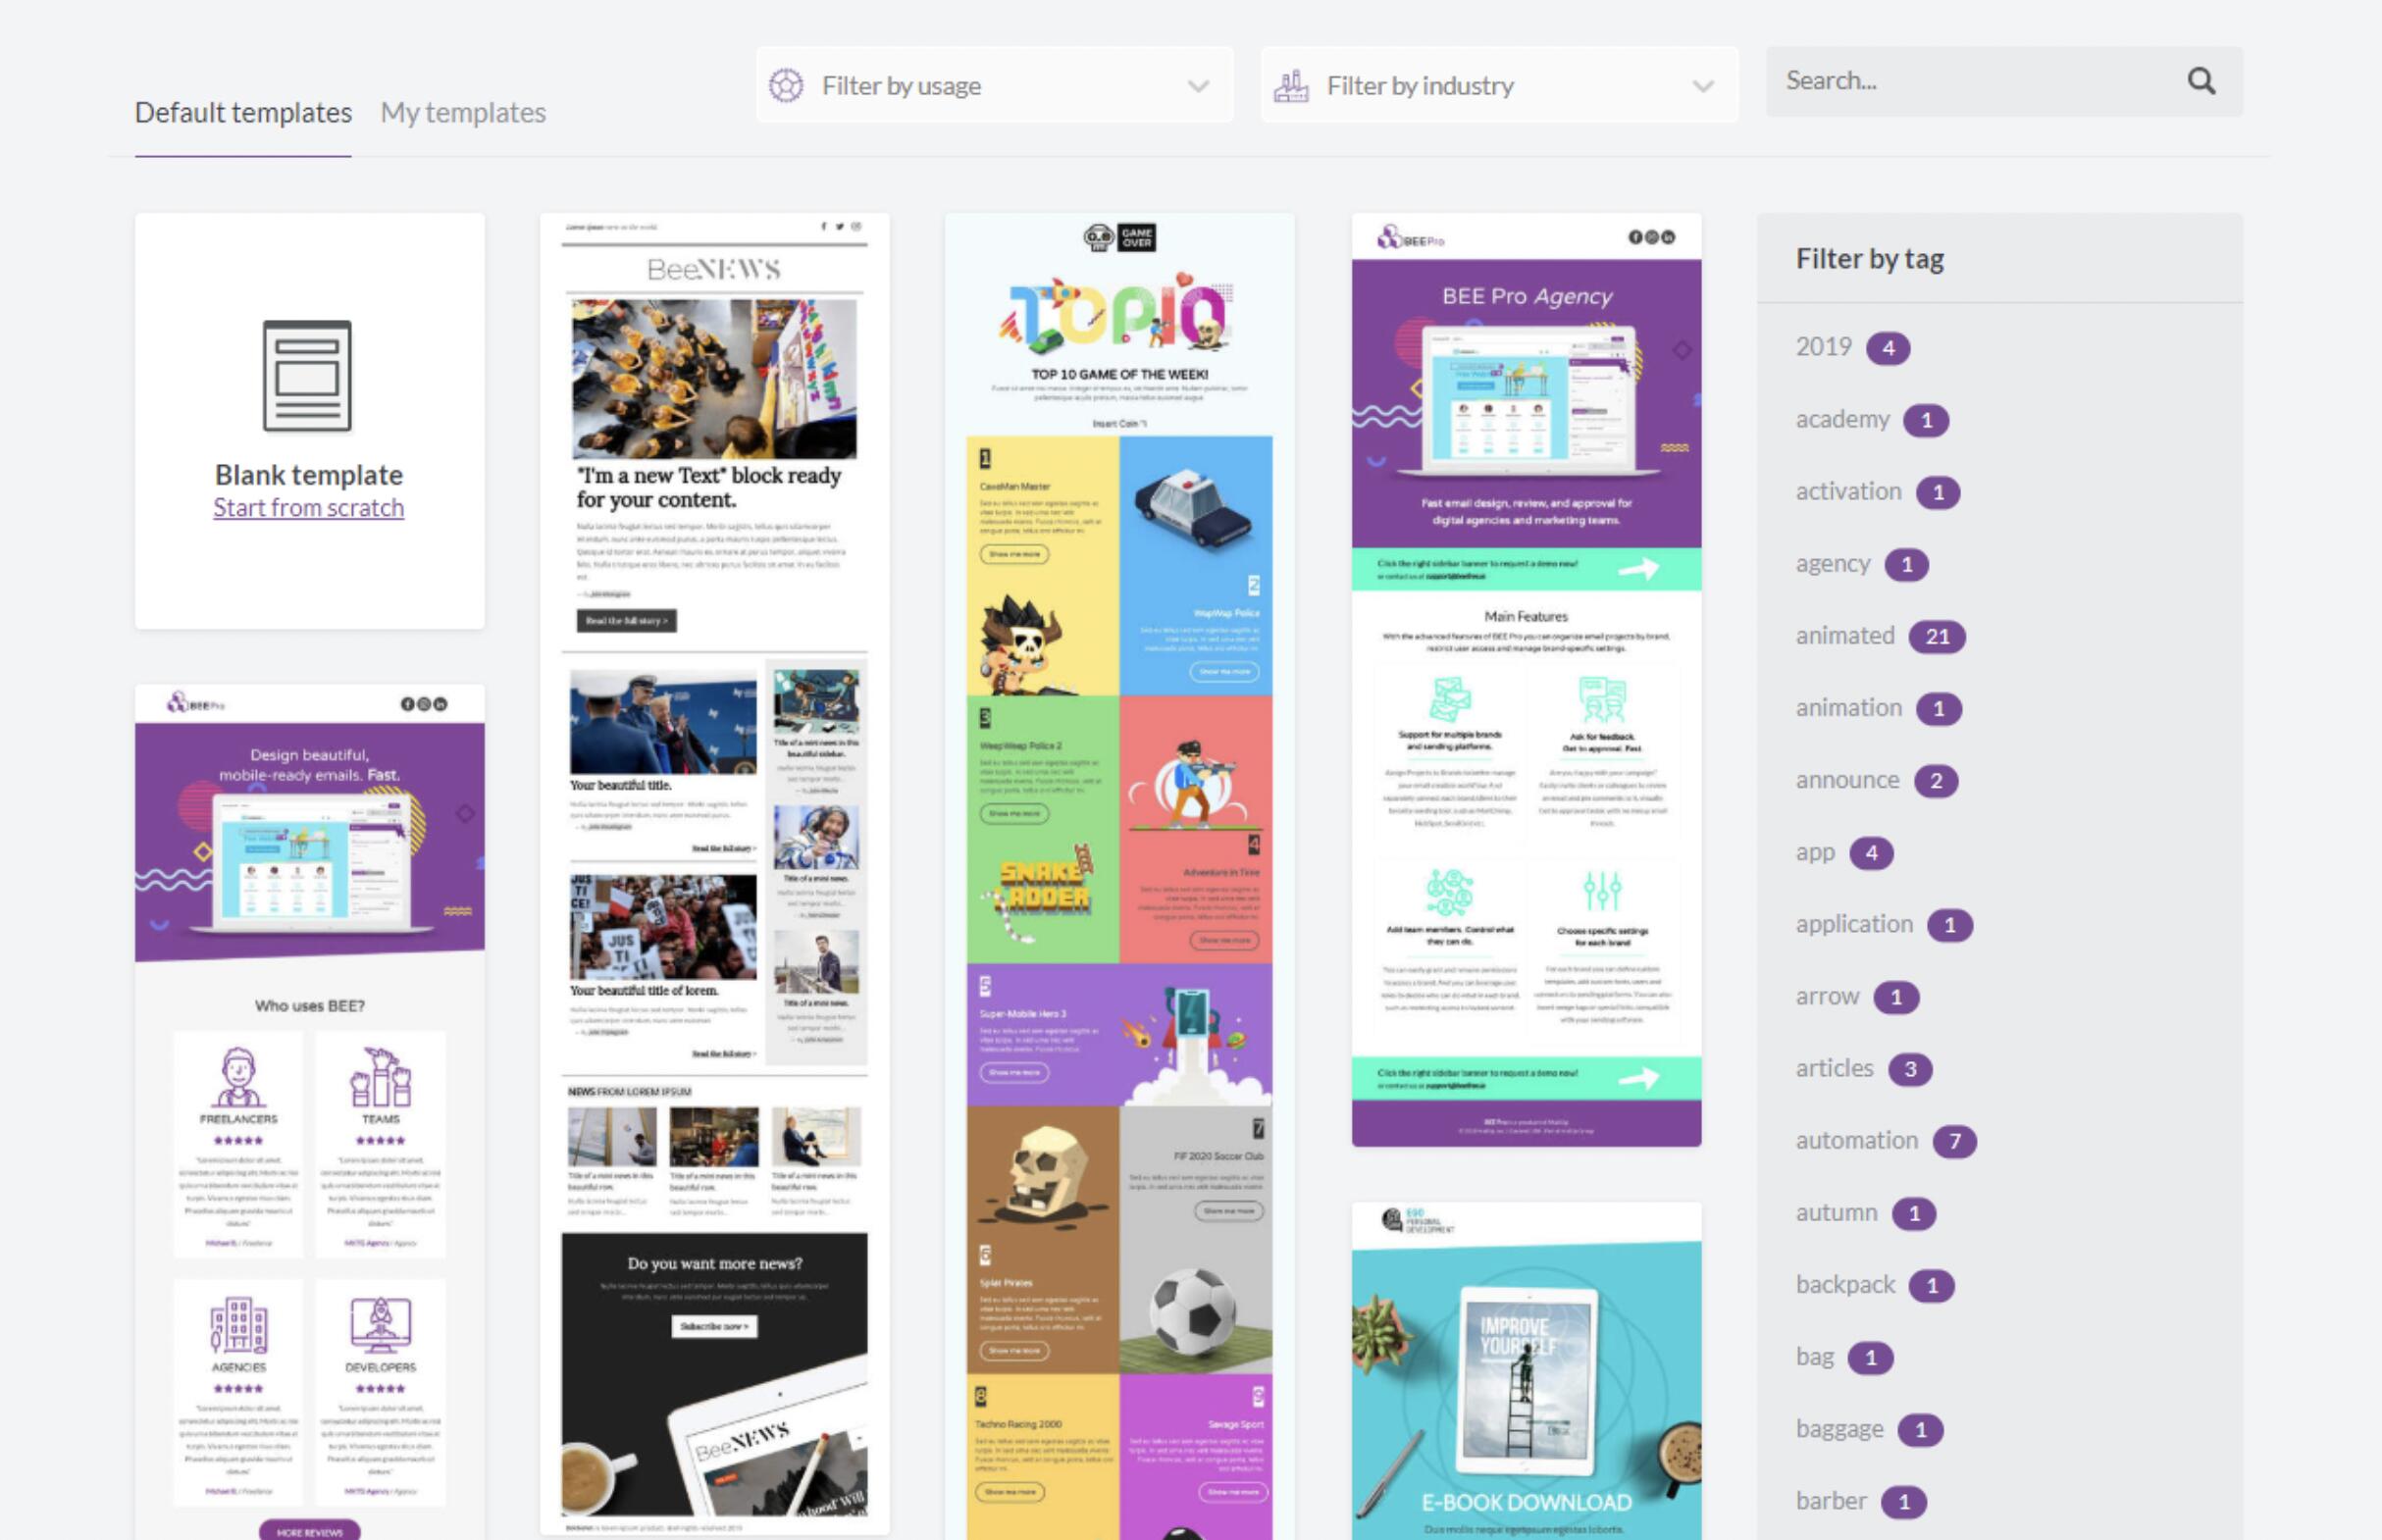
- Teams like our friends at Agropur build attractive custom emails with the built-in opportunity to track analytics in HubSpot. That ease of use makes creating responsive custom emails from scratch much simpler with full design flexibility and a library of over 1,300 email templates that can be edited to fit your industry or audience.
- Keep important data in one location while designing
- Users can create more sophisticated landing pages and emails while still maintaining all important data in HubSpot. There’s no need to move data to a completely different platform to design. Inari Medical, Inc uses the integration to create landing pages with an elevated layout before exporting them into HubSpot to send the final drafts to their associations. This streamlines the email design process from start to finish.
- Access design elements without interrupting the workflow
- When the design suite is part of the technical workflow, it reduces clicks significantly and helps ease the transition between working on different activities. For users like Thunder Funding, making use of the quick and easy process to create beautifully designed emails before exporting them to HubSpot is simple with access to granular design elements and powerful features like mobile design mode. "The integration with HubSpot works really efficiently. I design the email inside BEE Pro, once the design is ready I just have to click on the ‘Export to HubSpot’ , and... here we go, the message is ready to be used inside my HubSpot account. It perfectly tracks CTR and I didn't find any issues," says Matteo Mazzolari, a satisfied customer in the financial services space. "This helps me speed up the email creation process and helps me design amazing emails."
When design tools are more accessible, creativity can soar. These combined tools present tons of opportunities for new A/B tests, collaborations with other brands, and updated nurturing flows.Join over 400+ companies and teams across industries that have sped up their email and landing page design process with a stunning professional touch using the BEE Pro Integration with HubSpot.
How to Use Gmail for Email Marketing in 2023
If you’re in search of a new ESP, Gmail might not be your first thought. The platform is meant primarily for individual email accounts, not marketing purposes.But since it’s completely free, Gmail is hugely helpful for small businesses that are ready to expand their email marketing. As of 2023, Gmail has added numerous features that make it more suitable for email marketing, like multi-send mode as well as pre-set layouts, so it’s more capable of email marketing than ever before. Check out these tips for free email marketing with Gmail as your email service provider.
#1. Choose Gmail marketing tools
There are many free Gmail marketing tools that can help you run email marketing campaigns out of Gmail. We recommend tools such as Gumbamail, a free Chrome extension, to help transform Gmail into an email marketing tool that lets you schedule and send mailing campaigns to your subscribers without leaving Gmail.Another helpful tool for your Gmail email marketing is Google Sheets. Like Gmail, Google Sheets is free. It’s essentially Google’s version of Microsoft Excel, and it’s a fantastic tool for creating and managing your mailing lists so you can do a mail merge when you’re ready to send a newsletter (more on that momentarily).Bee also has a Gmail marketing tool to help integrate templates and designs. When you install Gumbamail and BEE Templates for Gmail, you’ll be able to create beautifully designed mass email campaigns inside your Gmail account. (We’ll walk you through how towards the end of the article.)
#2. Creating your email list
There are many ways you can create an email list for Gmail campaigns. We recommend using either Google Contacts or Google Sheets.Google Contacts is easy to access while you’re in Gmail. In Google Contacts, select the addresses you want to include and then add them to a new or existing label. When you’re through, send a Gmail message to each person with that label.Alternatively, you can use Google Sheets to create a Gmail mail mergeor use a free email marketing tool like Yet Another Mail Merge, which pulls addresses from a Google Sheet and then tracks your email campaigns.How do you know which option is best for you? It depends on your workflow and where your email contacts are coming in. When recipients are stored in Google Contacts, it makes sending easier: if each contact is labeled with the appropriate mailing list, you just type in the label name in the “To” field, and Gmail will send it to everyone with that label.The downside to Google Contacts is that you would generally need to add each contact manually. If you have an existing list that is in Excel or another spreadsheet program, or if you’ve exported a list from another email marketing platform for example, it’s easier to convert that list to a Google Sheets document than to add each contact to Google Contacts individually.In other words, if you already have a large, established mailing list, a mail merge from Google Sheets is best. If you’re just starting your mailing list and are building it a little at a time, Google Contacts is the better choice.If you want to send your email campaign with Google, ensure that your list has less than 500 users on it. Gmail has a built-in send limit that caps you at 500 emails in a 24-hour period (this applies whether you’re sending to 500 recipients in one email or 500 separate emails in one day). Based on these email-sending limits, Gmail is best for companies that have a small email list. Gmail’s free email-sending capabilities are an excellent choice for small businesses that are just getting started.
#3. Comply with local and international email regulations
To protect consumers against spam and data theft, there are certain requirements email marketers must follow. These can vary depending on where your recipients are.For example, the US has the CAN-SPAM Act, while Canada has the Canadian Anti-Spam Legislation or CASL. The European Union has the GDPR, or General Data Protection Regulation, which includes several guidelines that email marketers need to follow. For example, before sending someone a promotional email, you need to obtain their consent. Each of these laws is unique, but they contact requirements like:
- Receiving consent before sending emails to a new contact
- Telling recipients where you’re located
- Avoiding misleading headers and subject lines
- Provide an opt-out link for recipients who want to stop receiving your emails.
While some ESPs have built-in features to help you comply with these regulations, Gmail doesn’t. That means with a Gmail mass email. You’ll need to double-check that everyone on your email list has opted in and hasn’t unsubscribed, that you have included an opt-out link, and so on. This will take some time and work, but it’s an essential task to complete.
#4. Use a business domain name
If you send a mass email from your personal email address — one that ends with @gmail.com — there’s a greater chance that the message will be flagged as spam and never reach its recipient. Platforms like Gmail are truly meant for personal use, not marketing. So make sure your sender address incorporates a domain name. This both looks more official and boosts the chances that the message will land in your recipient’s inbox.Why is this the case? When a recipient’s email program is trying to decide whether an email is spam, one of its tools is to check the domain name of the email address. If there have been numerous spam emails sent from a particular domain name, the email program will block other emails with that domain name as spam too. When you send from your own custom domain, you know for a fact that no one else with that domain is sending out spam.
#5. Consider segmentation and A/B testing
In email marketing, segmentation refers to separating your mailing list into different groups based on established characteristics or purposes. For example, you might segment your list into different age groups, locations, genders, and so on. This can allow you to send more relevant emails because you can tailor emails to a particular group.Another email marketing practice you can use by breaking up contacts into groups is A/B testing. In A/B testing, you have multiple versions of an email, and you send them to randomly selected contacts so you can compare which version received more opens, more clicks, or more conversions.Both segmentation and A/B testing are highly beneficial for email marketing, and you can do them in Gmail, but keep in mind that it isn’t as easy as it is with dedicated email marketing platforms. If you’re using Google Contacts, you can segment by giving appropriate labels to each contact. Or, if you’re using Google Sheets for a mail merge, you can have different sheets for different segments
#6. Track campaign performance
Perhaps the largest limitation or challenge to using Gmail for email marketing is the lack of out-of-the-box data tracking. Traditional email service providers for email marketing will automatically track data like open rates, click rates, and so on. Gmail does not, although there are ways to gather data.One option is to use read receipts. If you have a paid Google Workspace account, you can turn on read receipts so you’ll know how many recipients open your emails. Recipients can open the email and decline to send you a read receipt, though, so this data is only partially reliable.You can also use Google Analytics to set up some data tracking features. For example, you can use Google Analytics to generate tracking links that don’t just take readers to the page they’re clicking on but also collect the click data.
#7. Use BEE's Gmail templates
Gmail has another big downfall as an ESP: its design capabilities are minimal. While Gmail does now have some layout templates, they are highly limited. Add-ons or extensions are the key ways to create beautiful HTML emails with Gmail. Luckily, with BEE Templates for Gmail you can send professionally designed emails directly to your Gmail account, and it’s completely free. To set up the add-on with your Gmail account, install BEE Templates for Gmail in Google Workspace Marketplace.
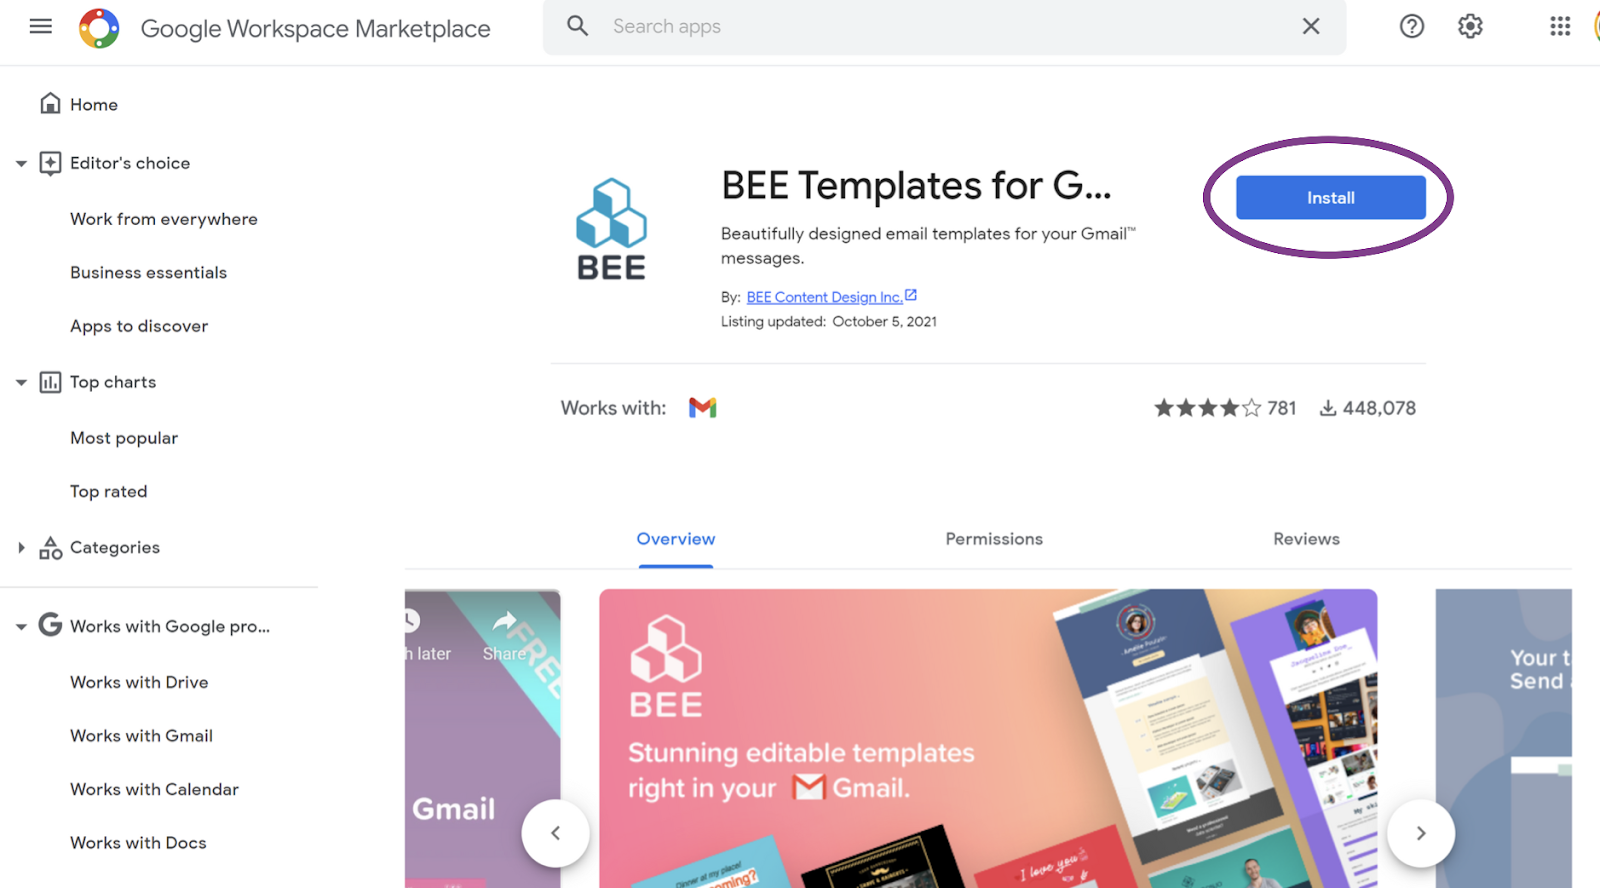
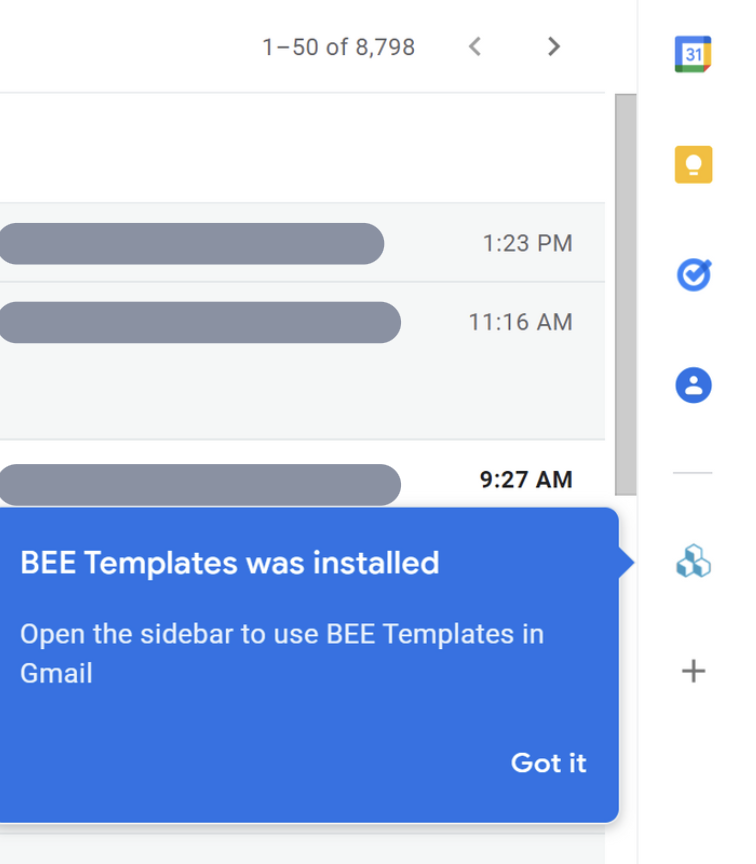
After the installation process is complete, you’ll see the BEE icon in the right-hand sidebar of your inbox.
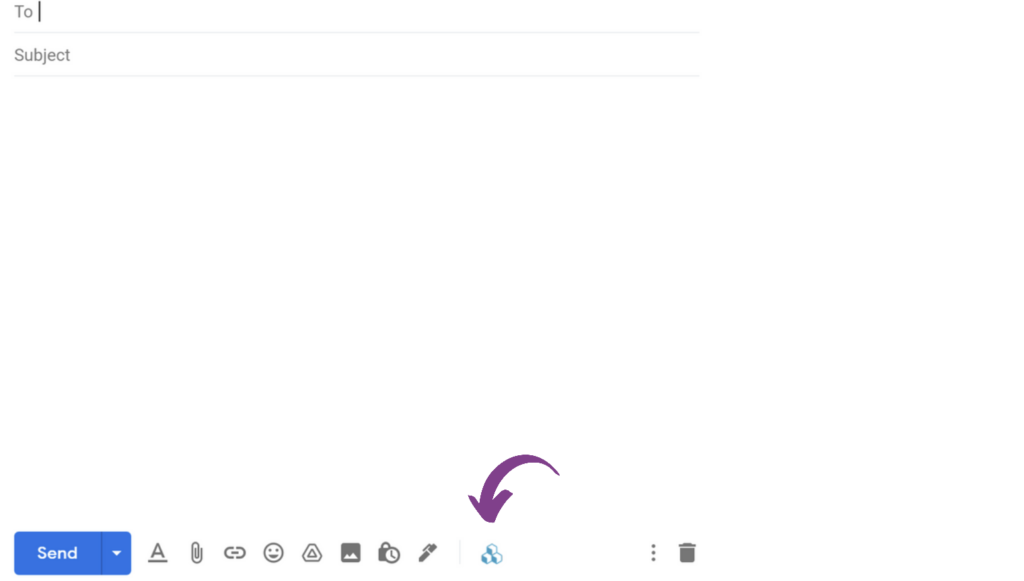
Open any email in your inbox and then click the BEE icon to select a template.
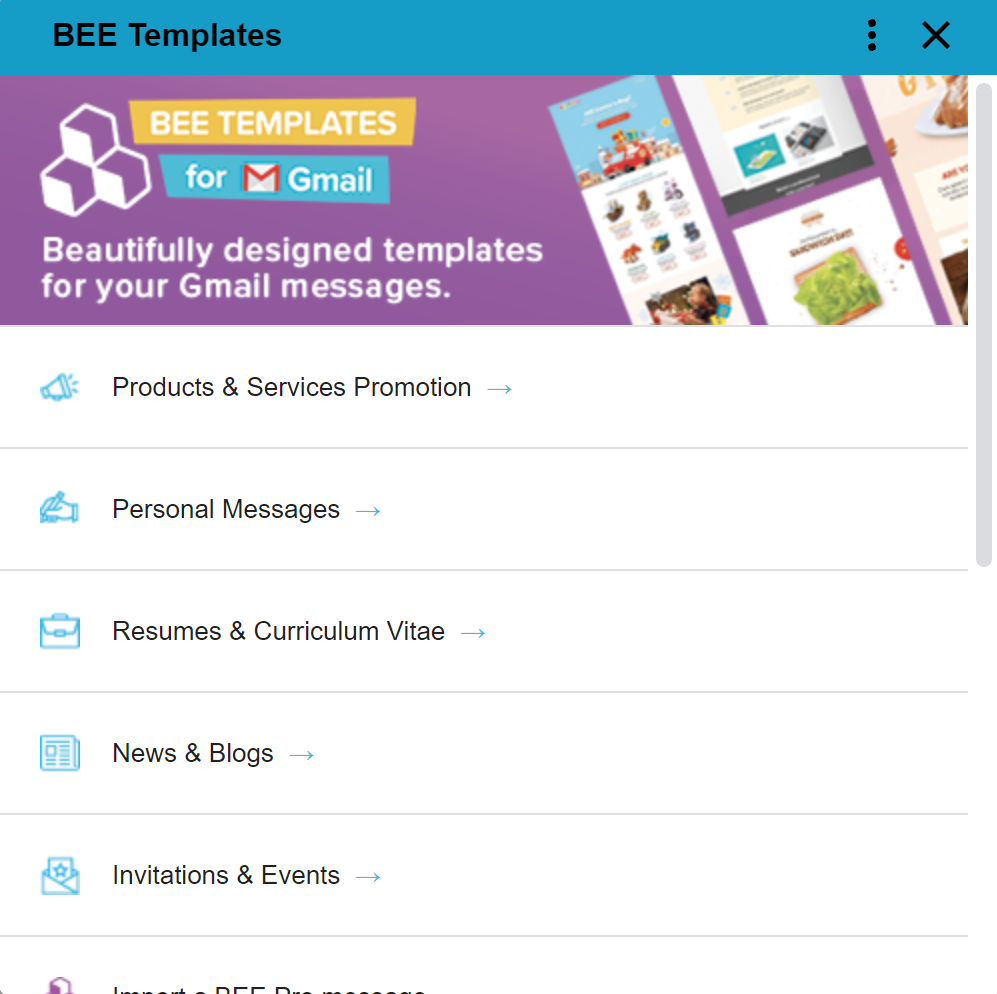
Once you’ve added your images and text, send the message to your email list. To learn more about this Google Workspace add-on, check out this video:If you have a BEE Pro account, you can also connect with Gmail from within your BEE dashboard. (Click here for a free BEE Pro free trial). This will allow you to send email templates for Gmail in the BEE editor (where you have additional editing capabilities) and then push them over to your Gmail account. BEE has dozens of email templates for Gmail, many of them free, that work for a wide variety of events, holidays, and marketing purposes.
Email templates for Gmail
Gmail for email marketing is a great choice for small businesses with manageable email lists who want to keep their budget in check. And when you combine Gmail with email marketing tools like the Beefree Gmail templates, your email marketing will soar to a whole new level. See what you can do and sign up for a free Beefree account today.
Share this post with your friends! Pin it on Pinterest ?
Editor’s Note: This post was updated on May 2023 to ensure accuracy and comprehensiveness.
Tutorial: How to Add Anchor Links in Emails
Do you use HTML anchor links in your email campaigns? Anchor links in email are incredibly useful for newsletters that are long and content-rich. They give your subscribers a chance to quickly scroll down and directly skip to where they want to read. And when your emails are easier to navigate, your readers are more likely to stick around and take in the entire message. Let’s take a look at exactly how anchor links can help your marketing and what you need to do to use them.
Anchor links in email are incredibly useful for newsletters that are long and content-rich. They give your subscribers a chance to quickly scroll down and directly skip to where they want to read.
Why use anchor links in emails?
What exactly is an email anchor link? An anchor link is a hyperlink in an email. When that hyperlink is clicked, it takes you to another part of the email instead of opening a separate window. Anchor links are most helpful for long messages, which is why they’re generally used in email newsletters instead of sales emails.You might choose to include just a single anchor link, or add a full anchor menu in your email header. This menu acts like a table of contents so readers can see at a glance what’s included in the message.Anchor links are huge for your email UX (user experience). Keeping your email simple can capture a user’s attention. And adding an anchor menu is a great way to simplify your message.Here's a quick example from Mobile Marketing Watch, a company that adds anchor links at the top of their daily newsletter so readers can use a table of contents to quickly navigate to each section.
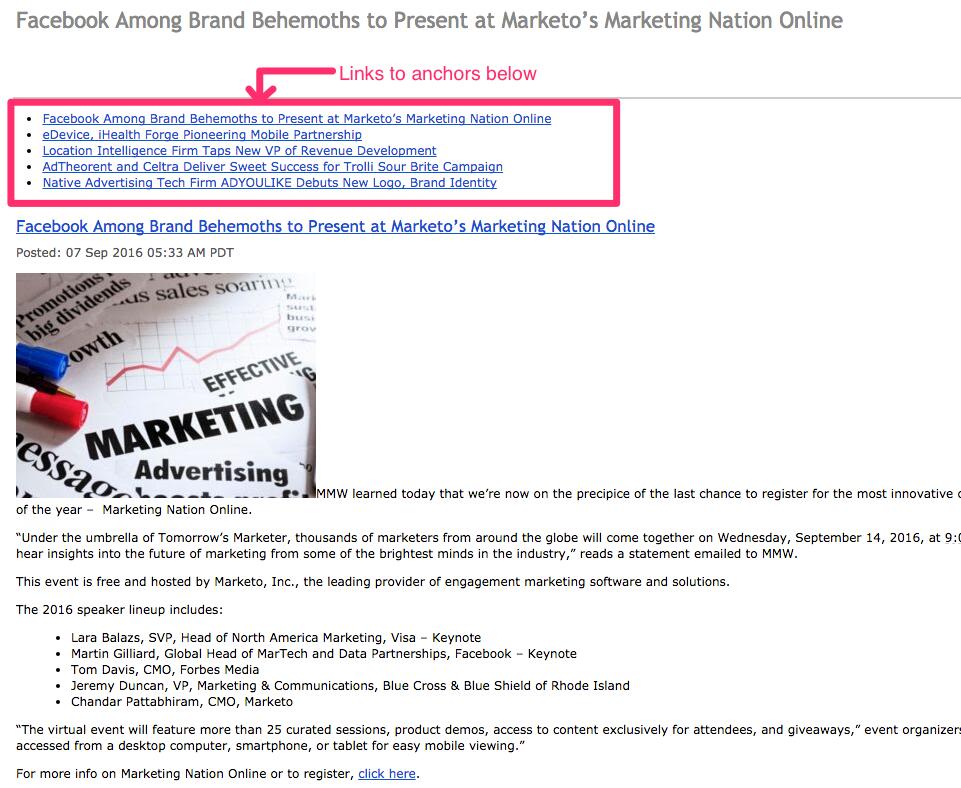
The MintLife Blog also uses anchor links (the three bullet points at the top) in its email newsletter. Like Mobile Marketing Watch’s newsletter, this email is plain text. The anchor links are helpful since these messages don’t have any colorful HTML subheadings to aid in navigation. A plain text email can be difficult to scan — anchor links eliminate the problem and make navigating these emails a whole lot easier.

How to create anchor links in an email
Good news! Adding an anchor link in your email campaign is easier than you might think. All you need is a basic know-how of the HTML link structure of your anchor links. As we'll see, an anchor link is made up of two parts: the URL link and the actual anchor tag that the link is "jumping" to in your email.Let's look at a specific newsletter example and show you how to replicate its anchor links using the BEE email editor. Follow along in this quick video recap or keep reading for a step-by-step tutorial:
Email anchor links example
We've always admired how anchor links were put to good use in Lenny Letter, a newsletter created by actor/director Lena Dunham and her best friend/director Jenni Konner. Lenny focused primarily on long-form content such as thought-provoking essays and stories, providing that content in the email itself. In this one, the header includes colorful anchor links to each corresponding story within the email. Here's how the links look across the top (starting with Jessica Grose and ending with Lena Dunham):
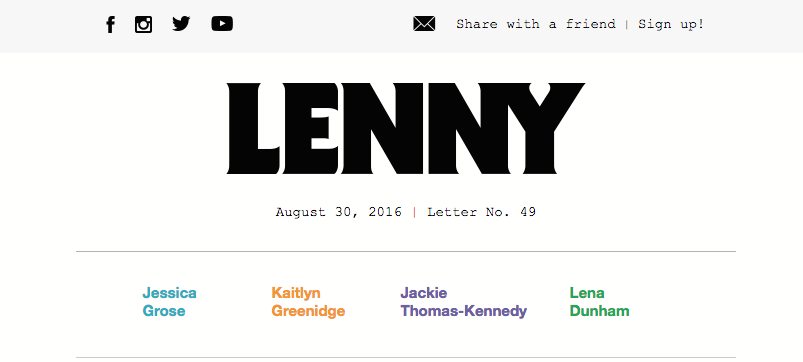
Each color corresponds with the author's story. If a reader wants to read Kaitlyn Greenidge's story first, tapping her name (the orange anchor link) takes the reader directly to her story section (where the title, "I Love Betty," is also in orange). Click here to see the newsletter (trimmed because of its length).
Getting started
Now that you're familiar with the concept of anchor links in emails, let's walk you through how to add them in the BEE editor. Open up the free BEE email editor to follow along.
Step 1: Build the email
To start, we'll recreate the Lenny email in BEE. The header is simple: Using a basic one-column design, drag in the Lenny image and add the text (in Courier) beneath it. Next, drag in a four-column structure to arrange the top anchors.
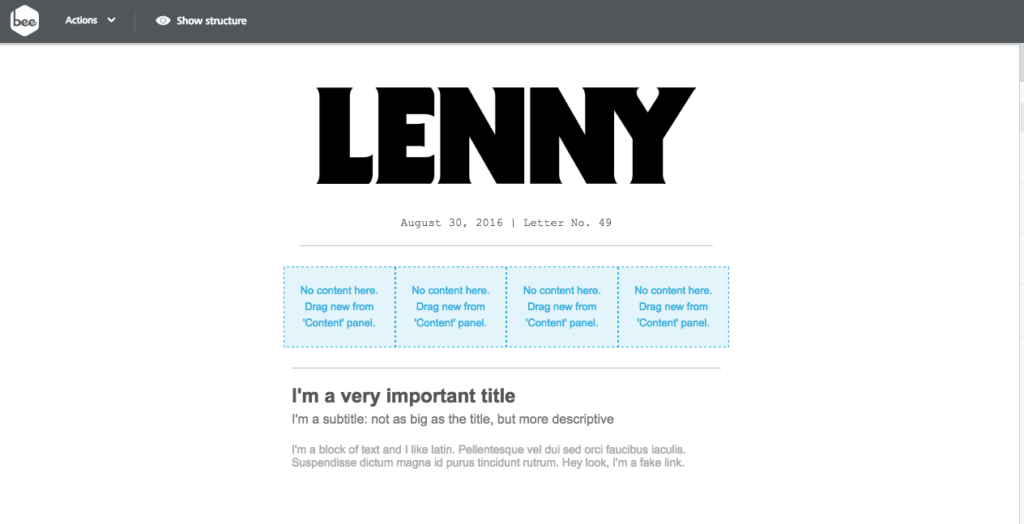
Continue to add text and images to recreate the header, intro and first story.
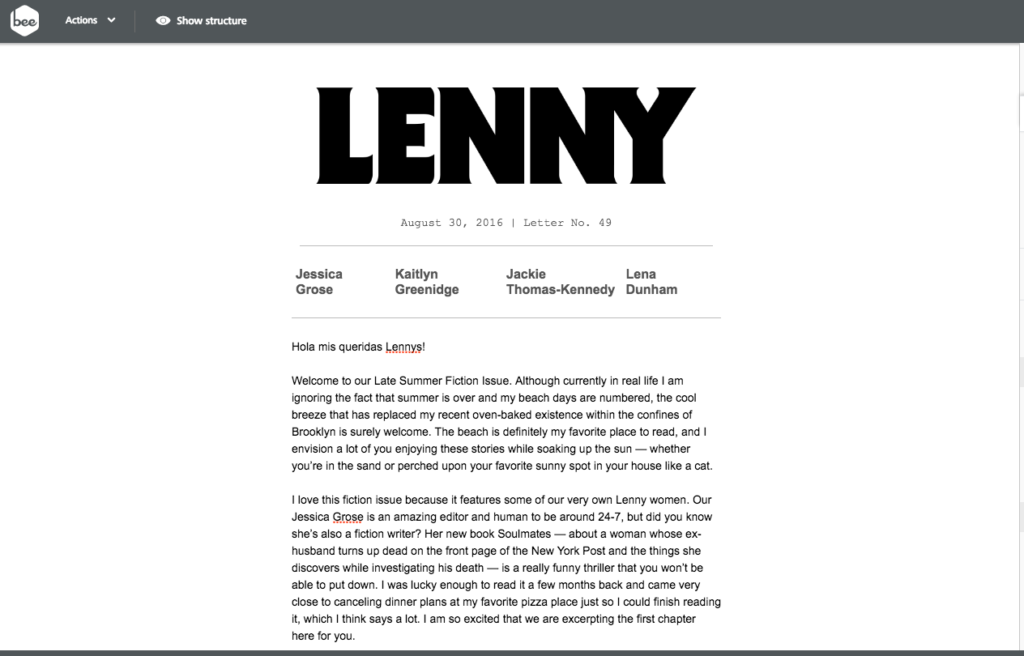
Afterformattingthe color of the text, get ready to add the links.
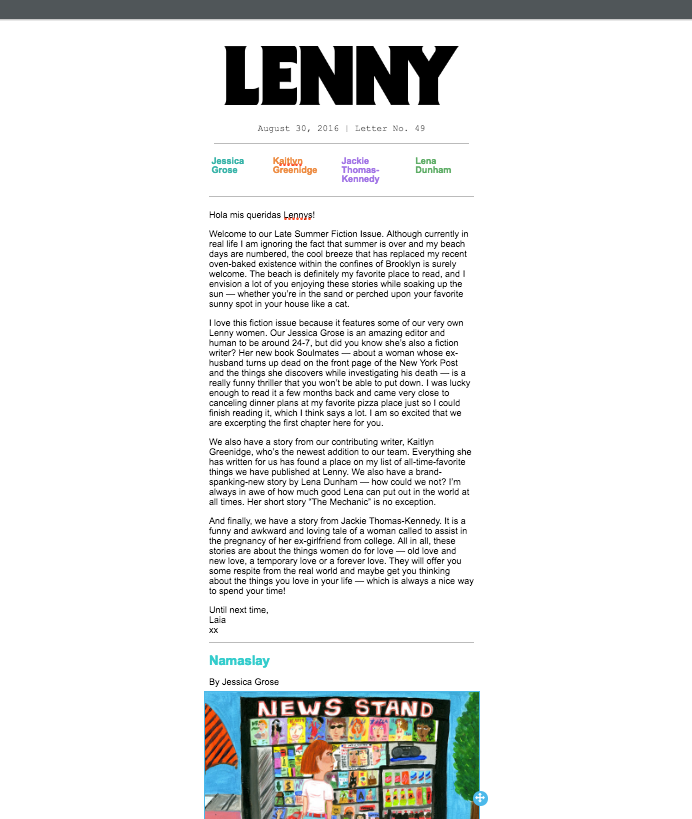
Step 2: Choose an anchor link name and its position
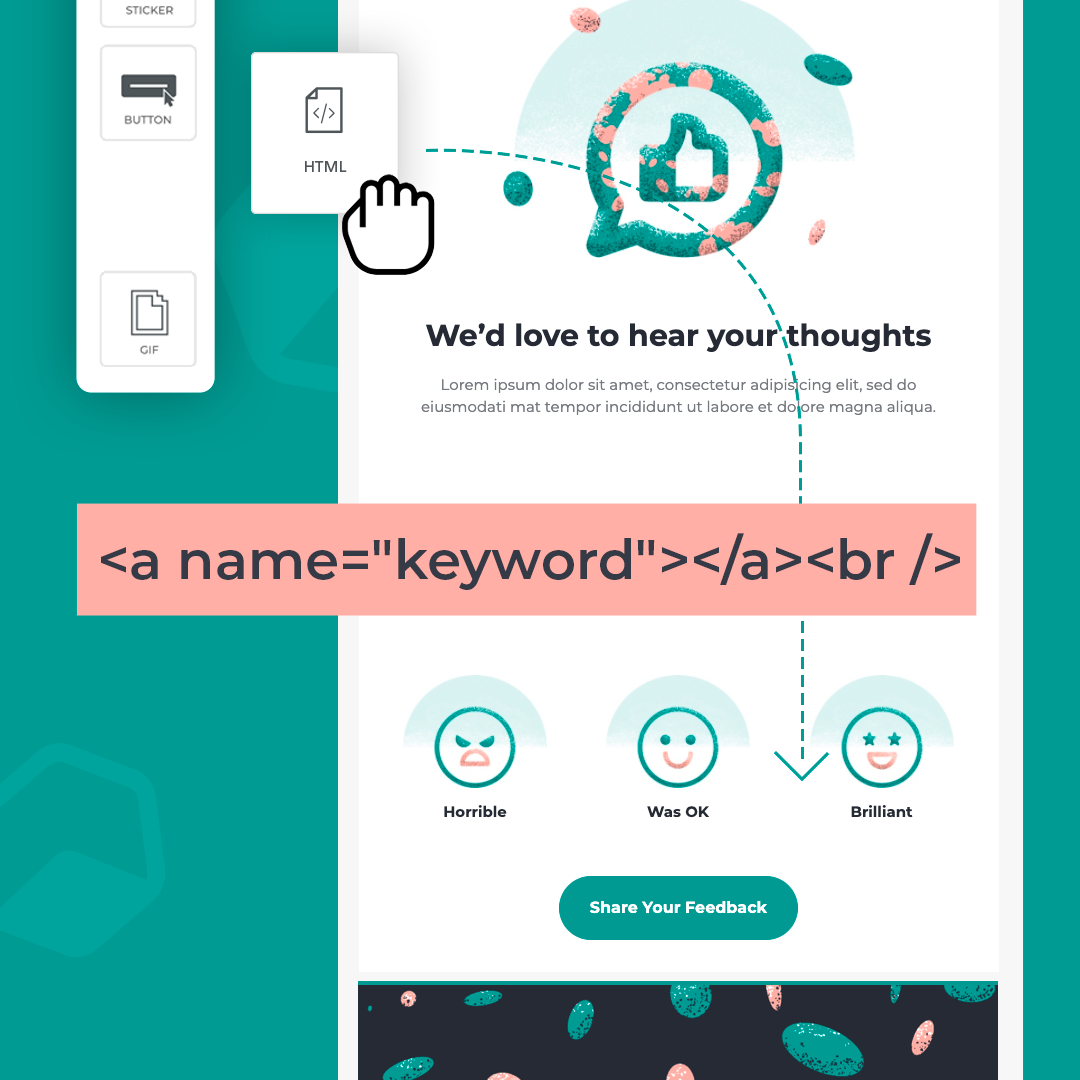
Now it's time to name and position the first anchor in the correct section of the email. For this step, we'll be using the custom HTML content block in BEE from the Content menu to add our anchor (think of it as a bookmark).
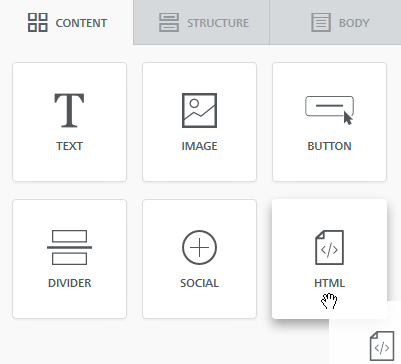
Drag and drop the HTML block to where you want the link to "jump" down to. In this case, it's right above Grose's story, titled "Namaslay."
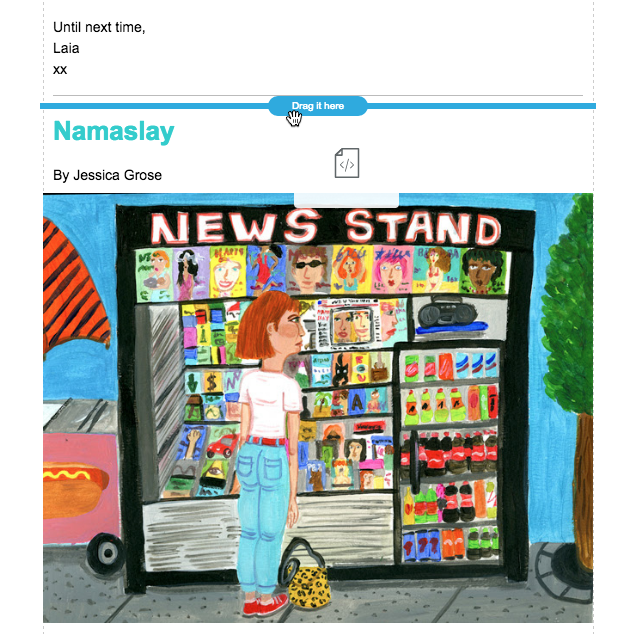
This is how the HTML block looks onceit's in position but before we add code:
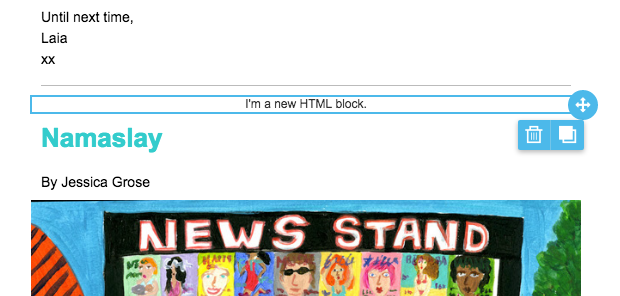
To create the anchor, paste in one line of HTML code in the Content Properties field of the custom HTML block on the right:
<a name="grose"></a><br />

The name in quotes ("grose") can be whatever you want. Just keep it simple and easy to remember — ideally one word — as this is the keyword you’ll use when linking to this anchor tag.
Step 3: Link the anchor
Now that the anchor's position has been specified, the text in the header needs to be linked to it. Simply select "Jessica Grose" and choose the Insert Link selection in the toolbar.

In the menu, link to the anchor by entering #grose in the URL field.
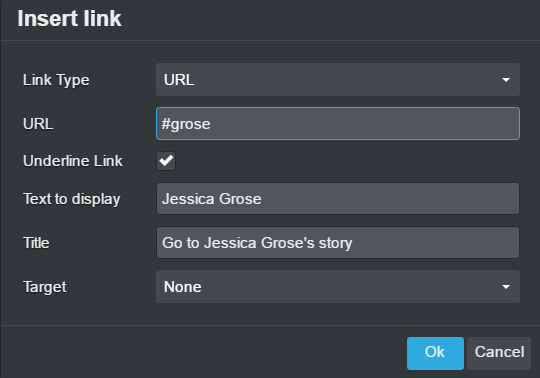
For the link to work, it's important to include the hashtag (#) before the name and to make sure the name matches the one you chose earlier. The shorter and simpler the name, the easier it'll be to remember.Now you’ve created the two parts of your anchor links: the anchor text and the link pointing to it.Duplicate that HTML content block, then copy it and drag it to the next section. Update the name that’s within the quotes and link the text at the top to the new anchors you’ve created.

Step #4: Send a test email to test the anchor links
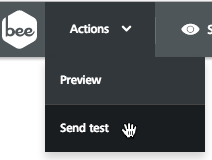
Once you receive the email (BEE’s “Send test” feature lets you send a test email to yourself), click on the anchor links and watch the magic happen:
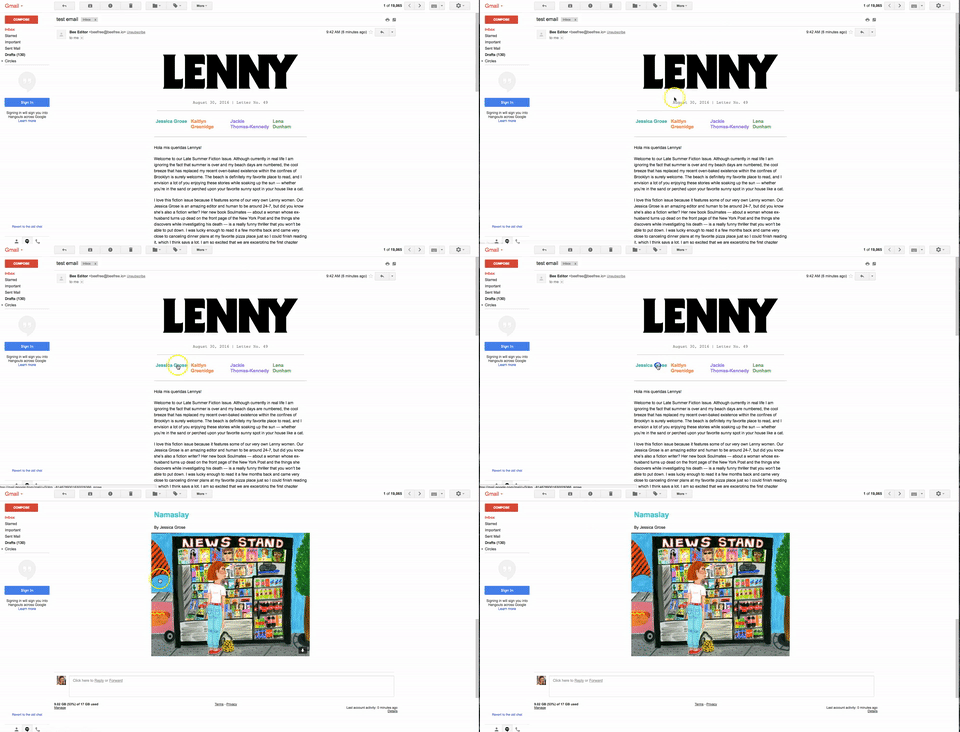
Voilà! If you’d like, you can add additional anchor links at the bottom of each section with text that says “Top of page” or something similar. This will let readers go back up to your anchor menu with a single click. But otherwise, your anchor links in email are ready to go.
Creating anchor links in email with BEE
Use the BEE email editor to create a table of contents with anchor links in your own emails. Our new Menu feature is the perfect way to add your links! With this feature, you can create an internal email menu that links to either internal or external links.Adding the menu is simple. Open up an email template in the BEE editor and drag a menu block onto the message. Click “Add new item” in the right-hand sidebar; this will allow you to add your text and then hyperlink that text with internal links. Set the link type when you add the URL’s.After you’ve set up your menu and added links, you can customize the layout and text of the menu to make it more visually appealing. You can also turn on the “Mobile menu” to access some additional design options. Mobile menus aren’t compatible with every email client. But for the clients that do support this option, this setting will optimize your menu for mobile viewing.BEE’s new Menu feature makes it easy and fast for you to create an anchor link menu for your email newsletters.
Email client support for anchor links
Anchor links are not supported by all email clients, so keep this in mind when deciding whether to add a table of contents to your newsletters. Here’s a quick report with some of the most popular email clients:Email clientSupport for anchor linksGmail (Web)YESGmail (Android app)YESInbox by Gmail (Android app)YESGmail (iOS app)NOApple Mail (iOS)NOYahoo! Mail (Web)YESOutlook.com (Web)YESOutlook (Android app)NOOutlook (desktop)YESOutlook for MACNOSamsung email app (Android)YESWindows Mail (Windows 10)YES(This table is based on our own data and data from Can I Email.)
Wrap-up: Using anchor links in email? Go Pro!
Email client support issues aside, adding anchor links to your email can be an effective and simple design tactic to help your subscribers read your content. Sign up for a BEE Pro free trial and follow the instructions in the workshop above to easily get this email marketing tactic down!Updated on July 21, 2020.
Share this post with your friends! Pin it on Pinterest ?
Save Time With Our ActiveCampaign Integration
BEE Pro and ActiveCampaign have merged marketing resources to streamline your workflow. With BEE Pro’s intuitive design tools and ActiveCampaign’s seamless automation services, this time-saving, email integration and partnership creates the perfect customer experience for email marketing growth.
How does this partnership work?
The ActiveCampaign integration in BEE Pro lets you connect your accounts with a click of a button. Choose from hundreds of customizable email templates, and when you’re ready to export, activate BEE Pro’s ActiveCampaign connector to instantly push BEE Pro emails over to ActiveCampaign.In order to fully enjoy the integration, you’ll need a BEE Pro Team or Agency subscription and an ActiveCampaign Lite plan. Both services, BEE Pro and ActiveCampaign, offer free trials to test out their offerings. Also, with a BEE Pro Agency plan, you are able to connect more than one ActiveCampaign account at a time so your teammates can gain access to this game-changing email integration as well.
Why use ActiveCampaign with BEE Pro?
BEE Pro is the best no-code design tool that empowers everyone to create beautiful emails in minutes. Enhance your emails with intuitive drag-and-drop functionalities, personalized brand kits, mobile design mode, co-editing and other time-saving features.ActiveCampaign activates your entire customer experience by automating a welcome series, contact engagement and more. Help your business grow by refining your email list, managing campaigns, tracking analytics and more.Combined, BEE Pro and ActiveCampaign provide a smooth design and exporting process to get your email campaigns out faster without sacrificing quality. It’s the best of both worlds with endless design capabilities and simple automation services. Users don't have to worry about migrating their email lists from one platform to the next, the direct integration in BEE does that leg work for you to enhance your experience.
How to connect BEE Pro and ActiveCampaign
Let’s take a look at how to connect your accounts to enjoy the benefits of both platforms.https://youtu.be/lJYNPzn2wU0Exporting your BEE Pro emails to ActiveCampaign is quick and easy. Here are steps on how to connect them:
Export your email
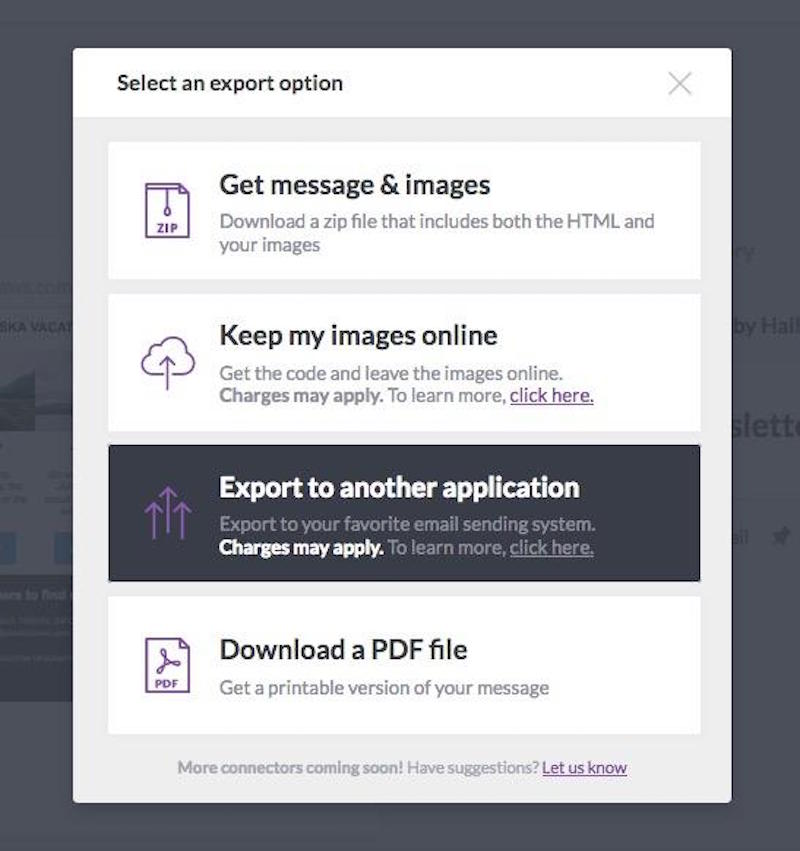
When you finish editing your email in BEE Pro, click “Export Message,” and choose “Export to Another Application” in the pop-up.
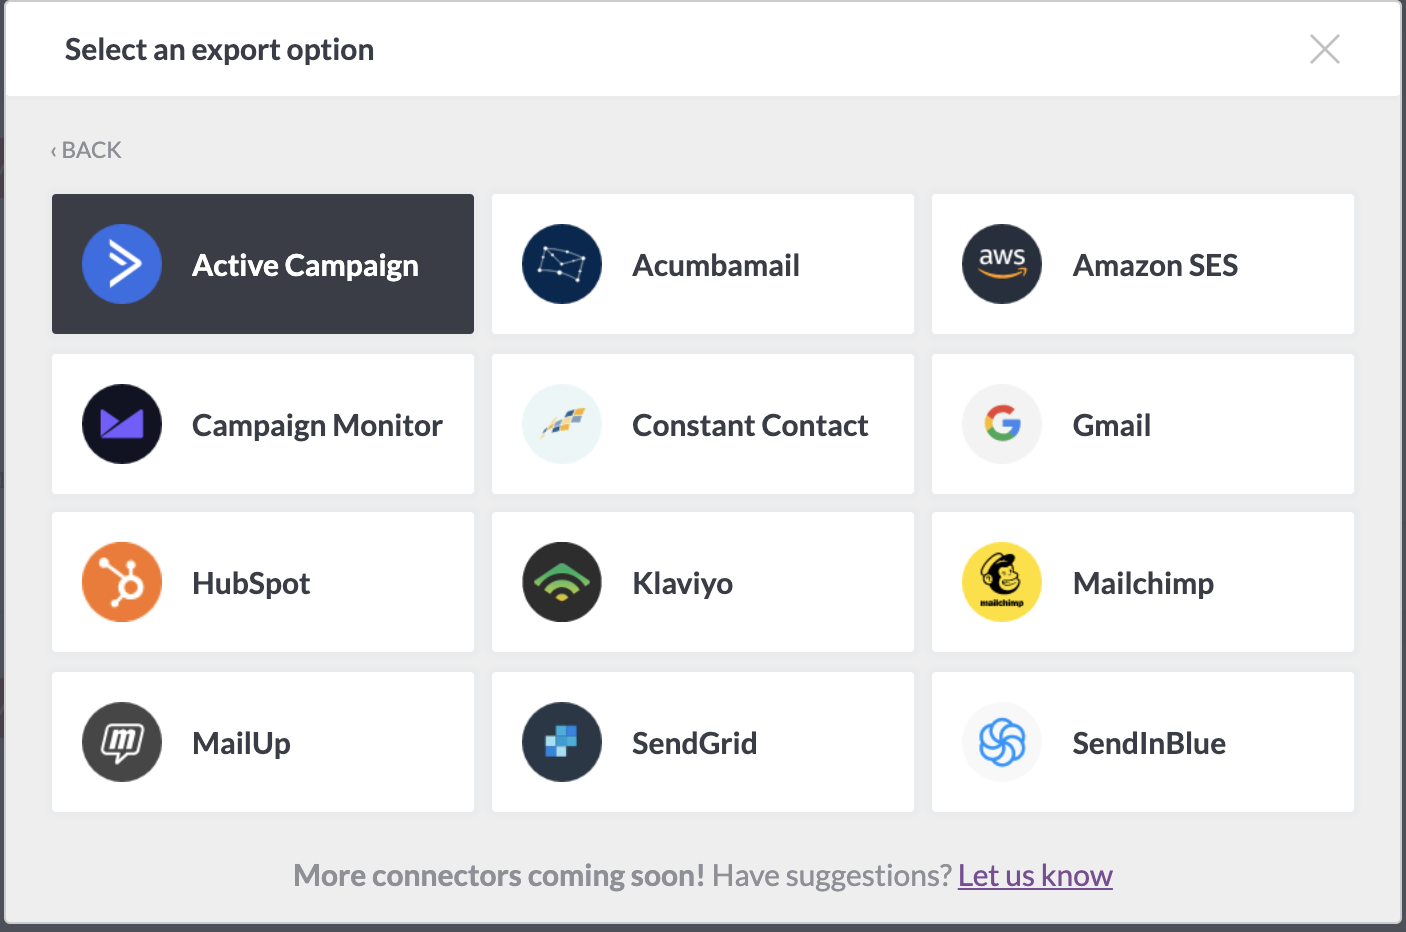
Then an “Export Option” pop-up will appear. Here you will click on the ActiveCampaign connector.
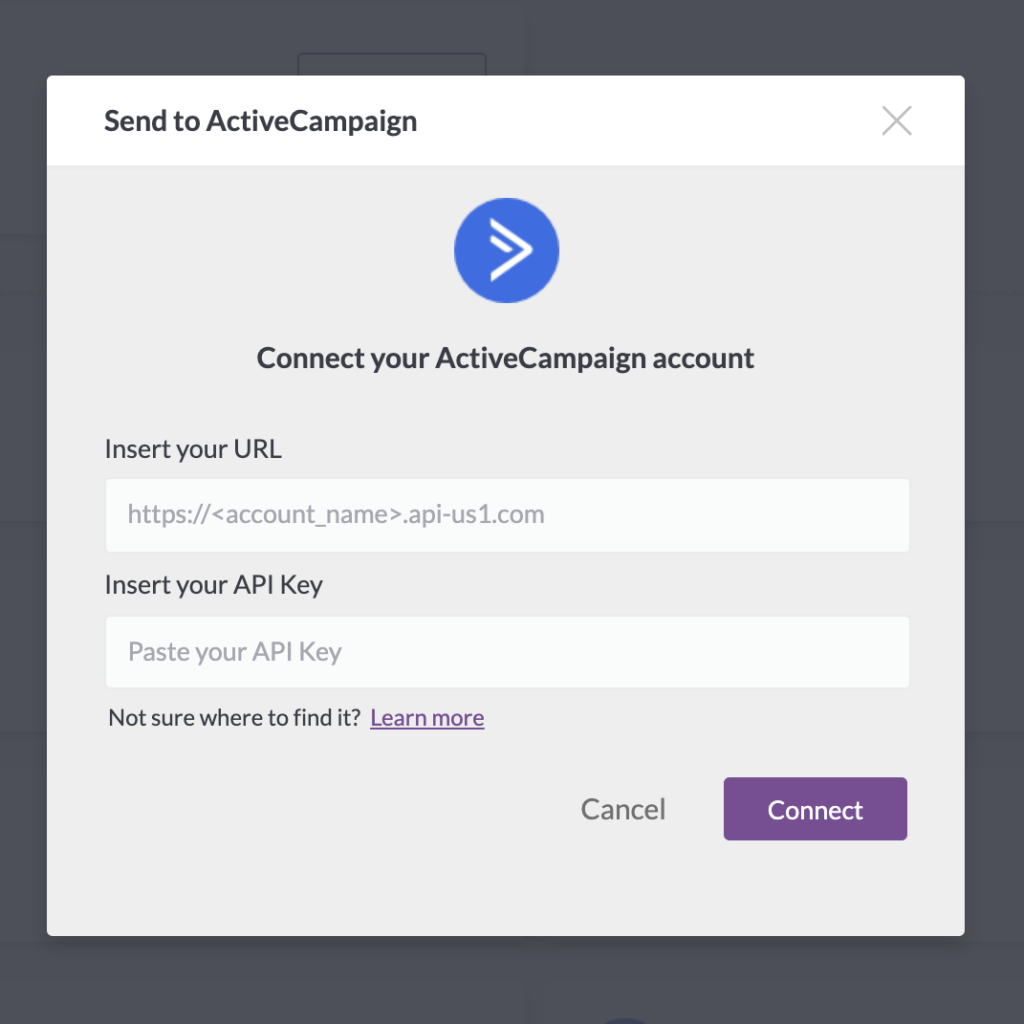
From there, an additional pop up will arrive, asking for your API URL and Key.
Retrieve your ActiveCampaign API
Find your ActiveCampaign API URL and key by heading to your ActiveCampaign dashboard. Click “Settings” on the left sidebar. Then, choose “Developer” in the dropdown bar.
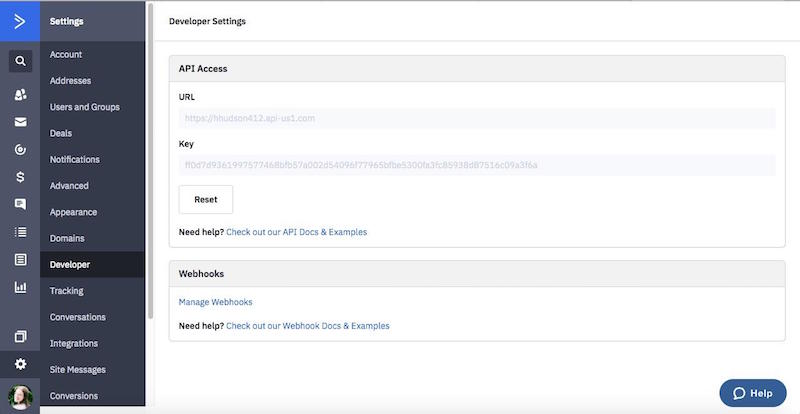
This page provides your API URL and your API key. Copy and paste the ActiveCampaign API URL and key into the respective boxes on the BEE Pro connector pop-up. Then click “Create,” to automatically push your email to ActiveCampaign.
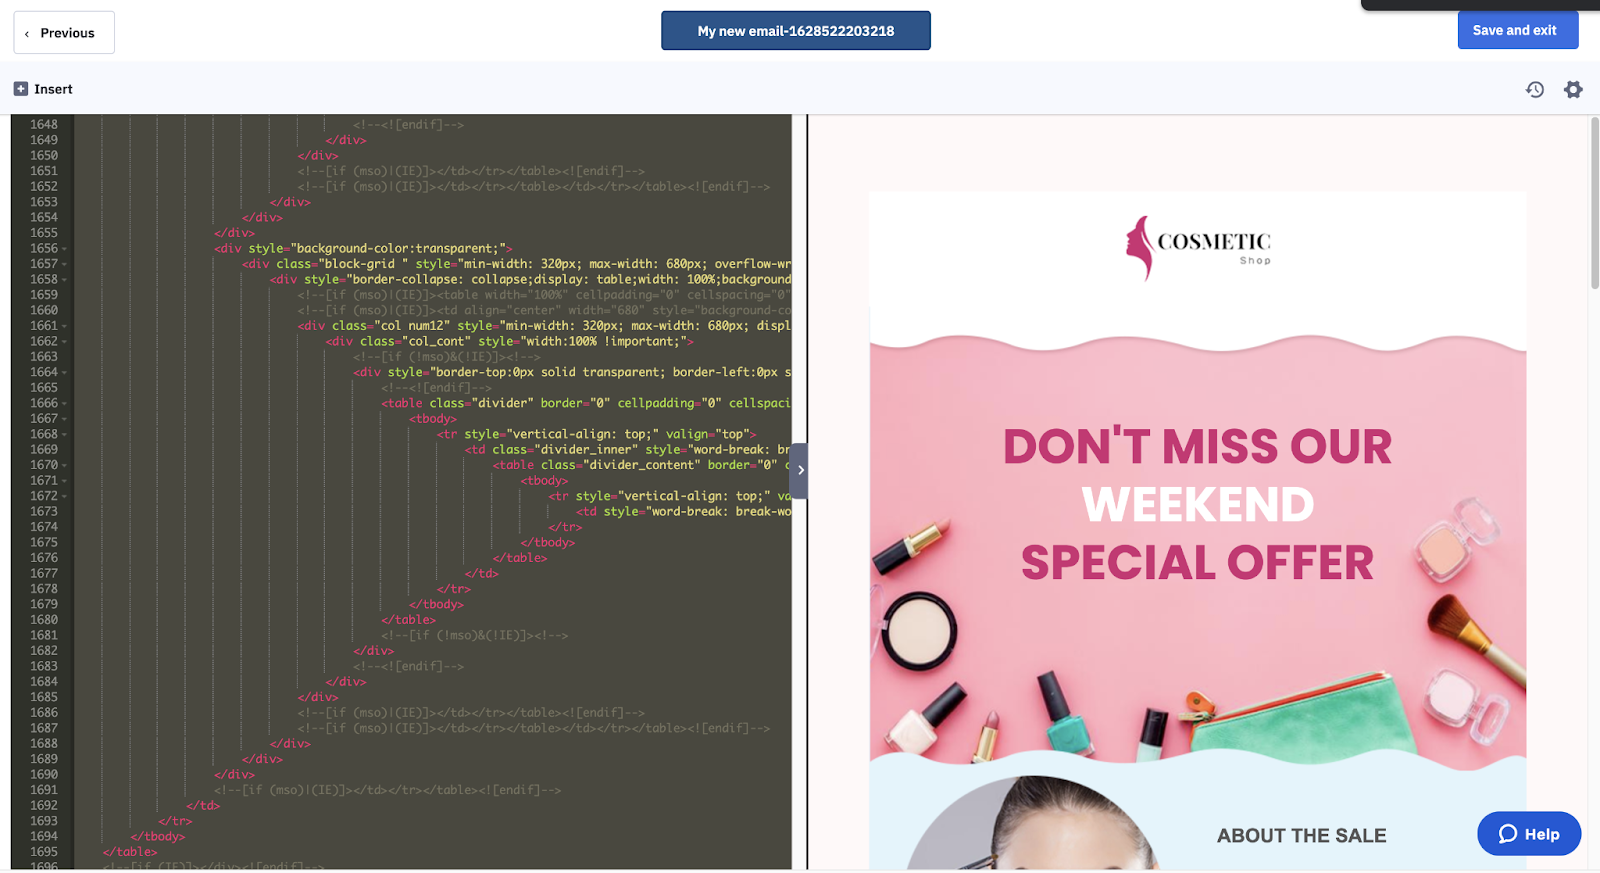
You will find the emails you push over from BEE Pro in your ActiveCampaign “Templates” section.
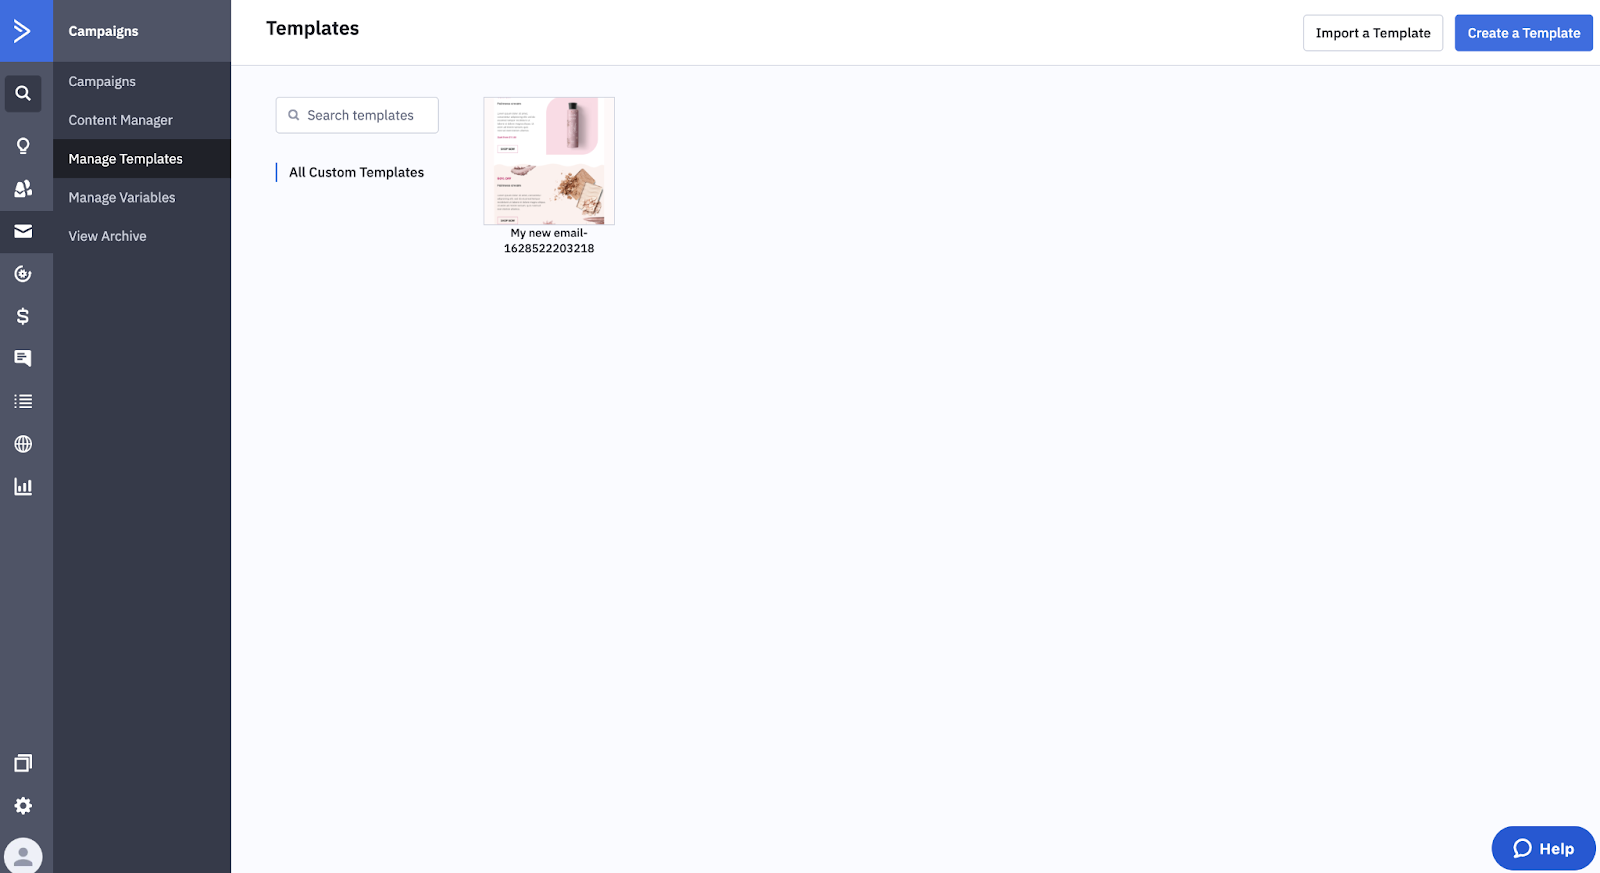
Another way you can connect BEE Pro and ActiveCampaign is through the “Settings” option that you will find on your BEE Pro dashboard. Click on “Settings” and then “Connectors.” ActiveCampaign will appear as the first connector on this list.
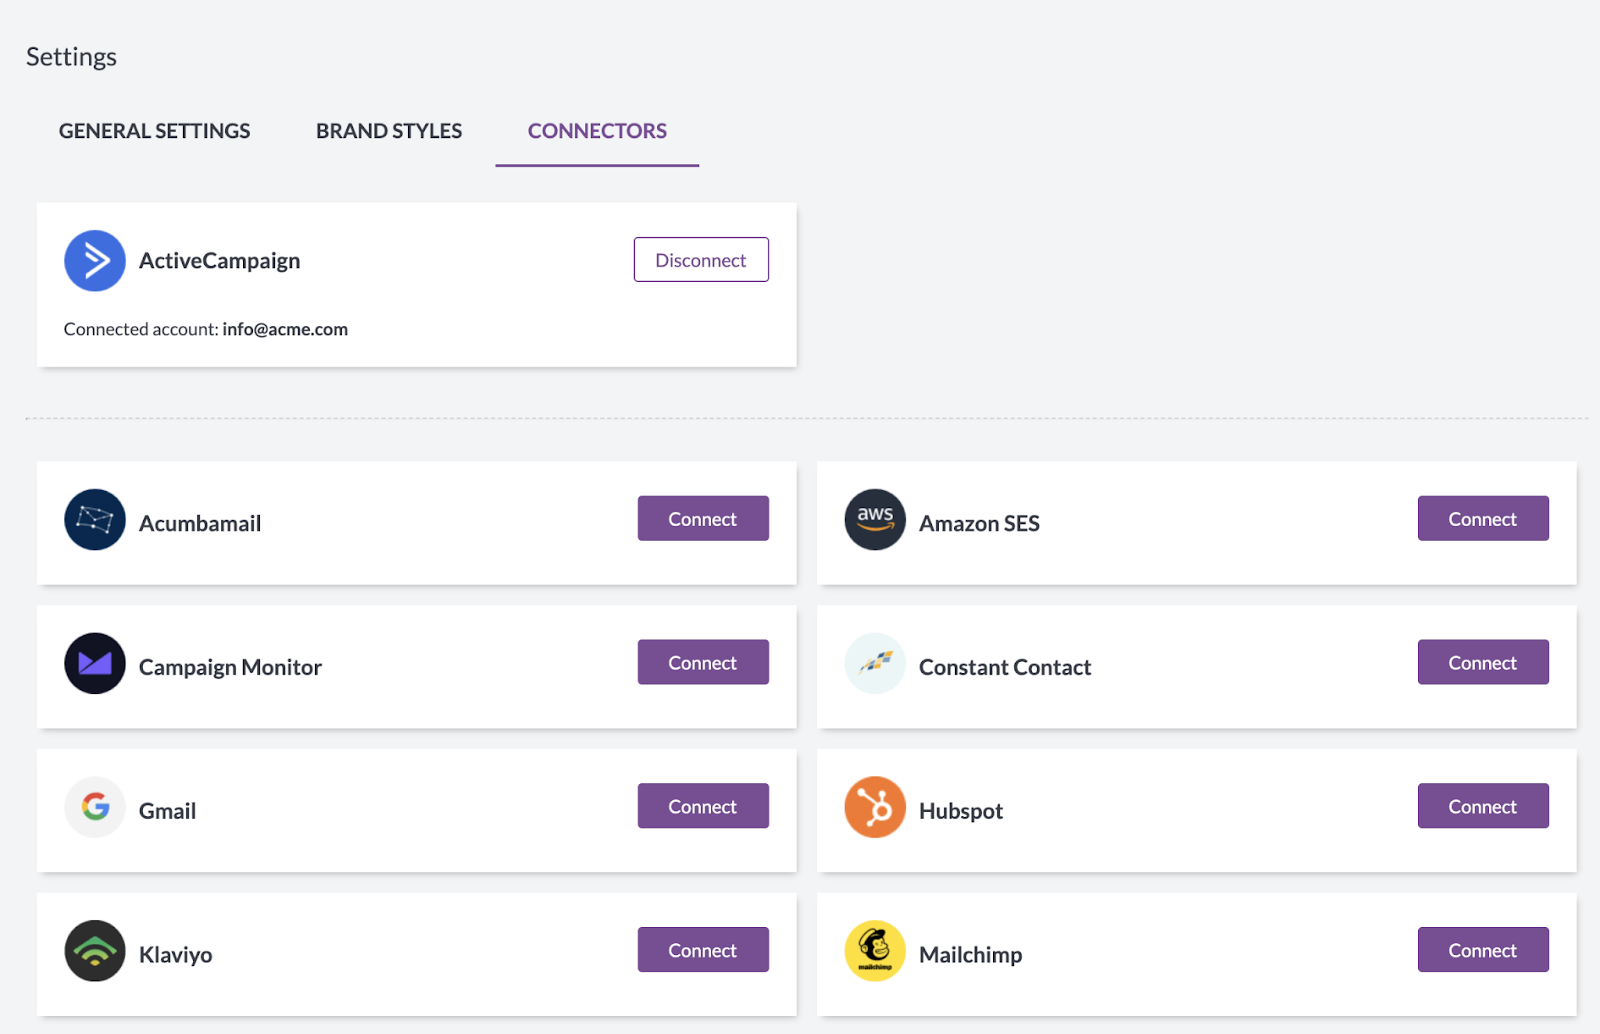
Click “Connect,” and that same box will appear asking for your API URL and key.

Again, retrieve the URL and key from ActiveCampaign, and paste them into their respective fields. Finalize by clicking “Connect” and you’re good to go.
Wrap-up: Using ActiveCampaign with BEE
Using automation tools such as ActiveCampaign and BEE Pro is a smart move for marketers — it will help you save valuable time and money as you work to promote your business. Get a BEE Pro free trial and connect with the ActiveCampaign integration for a more efficient email marketing workflow.
3 Steps to Create a Free Email Marketing Campaign
Email marketing is an essential part of your business, but it can quickly get expensive. How can you create an email marketing campaign that doesn’t break the bank? Answer: By looking for free tools that produce high-quality content.With BEE, you can create a full email campaign set — all the way to a built-in landing page with a form that collects user data. This type of email can give you a higher conversion rate, and although it might look complicated, it’s actually fairly simple to create. Here’s your guide to creating a free email marketing campaign in BEE — check out our video tutorial below, or keep reading for the text version.https://www.youtube.com/watch?v=fXRq7mxylyU&t=15s
How to build a landing page that matches your email marketing
You can create an entire email campaign set using BEE’s email marketing software, including emails and landing pages alike. Here, we’re going to create an email marketing campaign with one email and one landing page to collect data using BEE, Google Forms, and MailChimp.In order to move your email from BEE to MailChimp’s free version, you’ll need a BEE Pro account. If you haven’t upgraded your account yet, you can start your free two-week trial (no credit card required). Here are three simple steps you can take to create your free email marketing campaign.
Step #1: Create the landing page
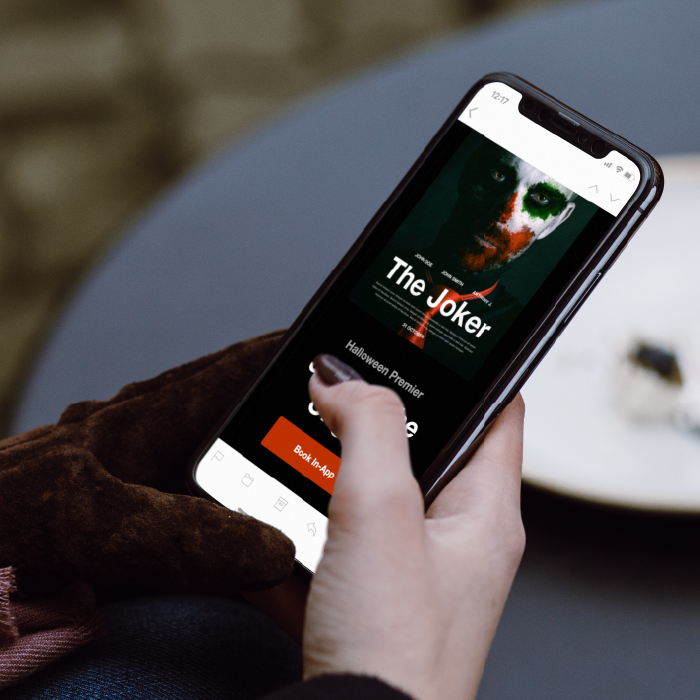
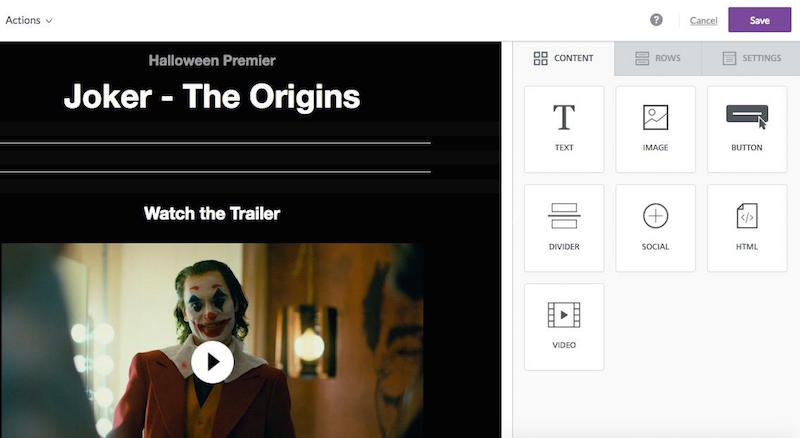
From within your BEE Pro account, create a new project and choose the Halloween Movie Premier template; fill it out with graphics, text, and images. In this example we’re promoting an event, so our email includes language that mentions the date, venue, and other need-to-know details. We’ve also added a call to action that asks people to RSVP by filling in a form — which we’ll create in the next step.
Step #2: Create a Google form
Save your BEE template and hop over to Google forms for the next step in the process. Open up a blank form and fill it out, leaving space for readers to give you any relevant information.
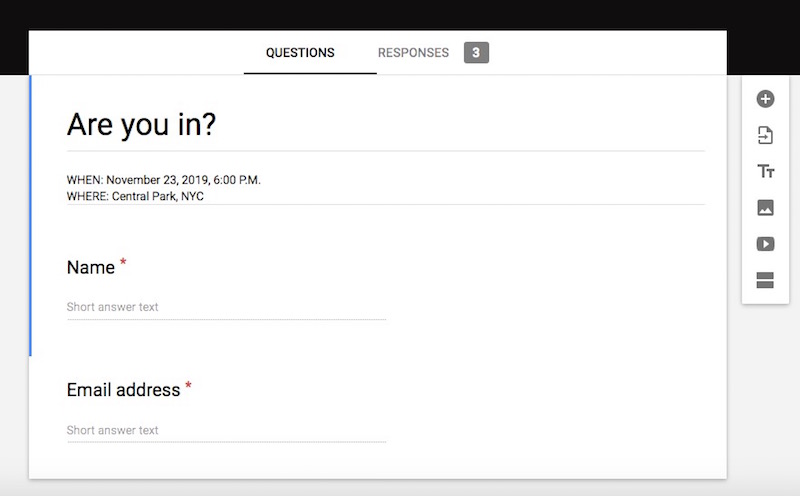
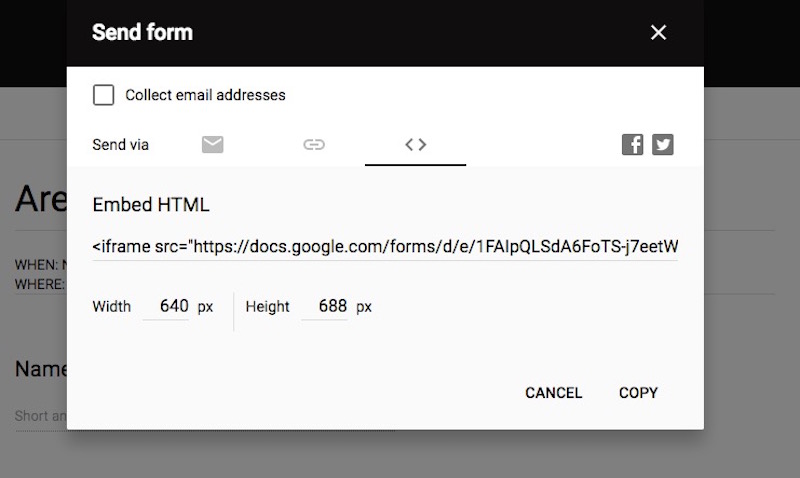
When you’re through creating the form, click the “Send” button in the upper right-hand corner and then click on the HTML symbol (this is the third option in the “Send via” row and looks like this: <>). Copy the HTML.
Step #3: Publish the landing page
Head back into the BEE editor and add an HTML content box to your email. Once you drag and drop the content box, you can copy and paste your HTML code from Google into the text box on the right sidebar, and your Google form will appear in the email. If the dimensions of the Google form are wonky, scroll horizontally through the code in the text box until you find the width and height; then type in 100% for the width and 670 for the height. By doing this, you ensure the form will be responsive on both desktop and mobile.
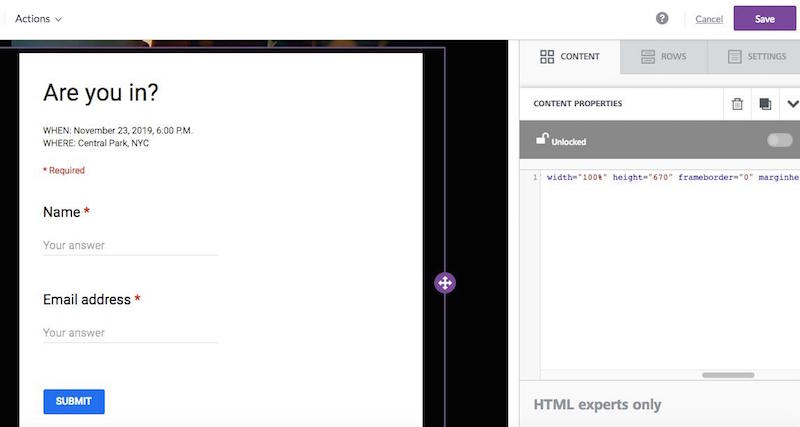
Save the message and you’re now ready to publish your landing page. You can leave your landing page on BEE and share it with the link you can find in the BEE details page (remember, though, that with this option your landing page will only be active as long as you have a BEE Pro account). Otherwise, you can export the landing page as HTML by downloading the HTML folder and use another method to publish it. These other methods will vary depending on what platform you use to host your site and how it’s set up, but you can either use your server or find a few common methods here or here.Copy your landing page URL so you’ll have it for the next step; if you don’t like the way the URL looks, you can shorten it using Bitly. You can find the link to your landing page on the “Message Details” screen after customizing a template — copy the link by clicking the tiny clipboard symbol on the top right-hand corner of the message image.
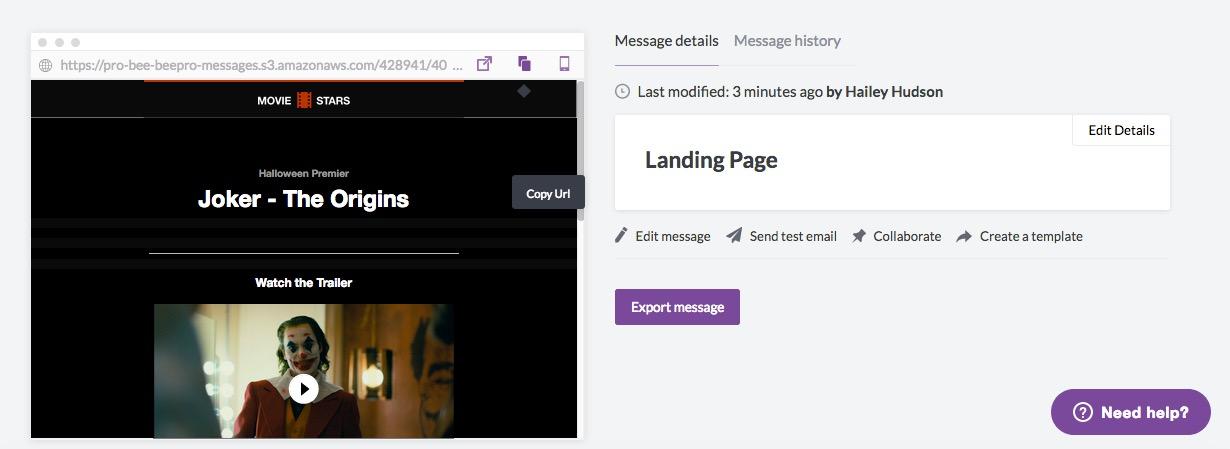
Step #4: Customize and send your email
Go into your BEE Pro project folder and copy the landing page; rename it and customize the new message as an email. (This is a helpful benefit that BEE Pro offers: You can copy, paste, and save your messages!) Open the email and delete the Google form. Since your landing page is published, you can now add the URL of the landing page as a CTA in the email by pasting the link you copied in the previous step.
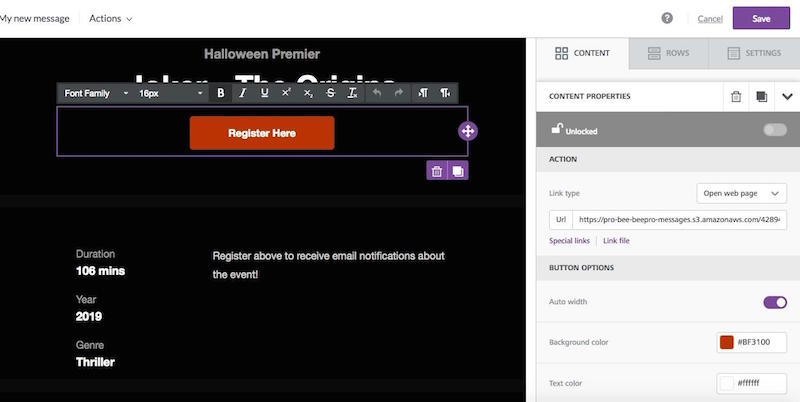
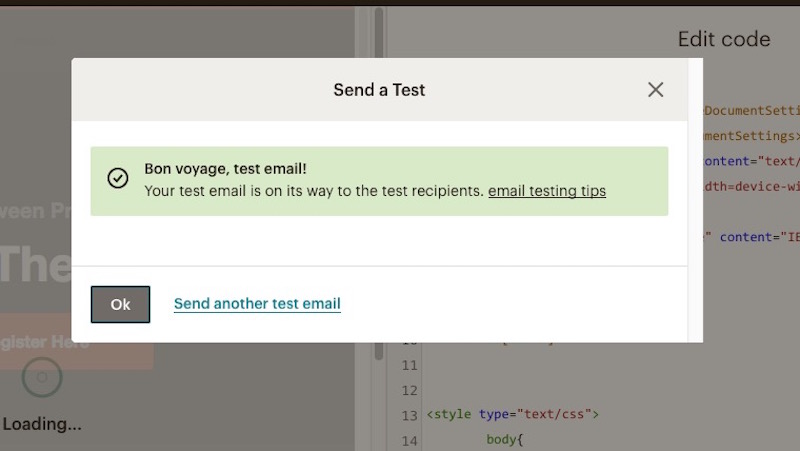
Once you’ve added the landing page link as a CTA, push your message over to your email service provider of choice (BEE Pro offers multiple connectors) by clicking “Export message” and choosing “Export to another application.” Here, we pushed our email over to MailChimp and then sent the test email from there.
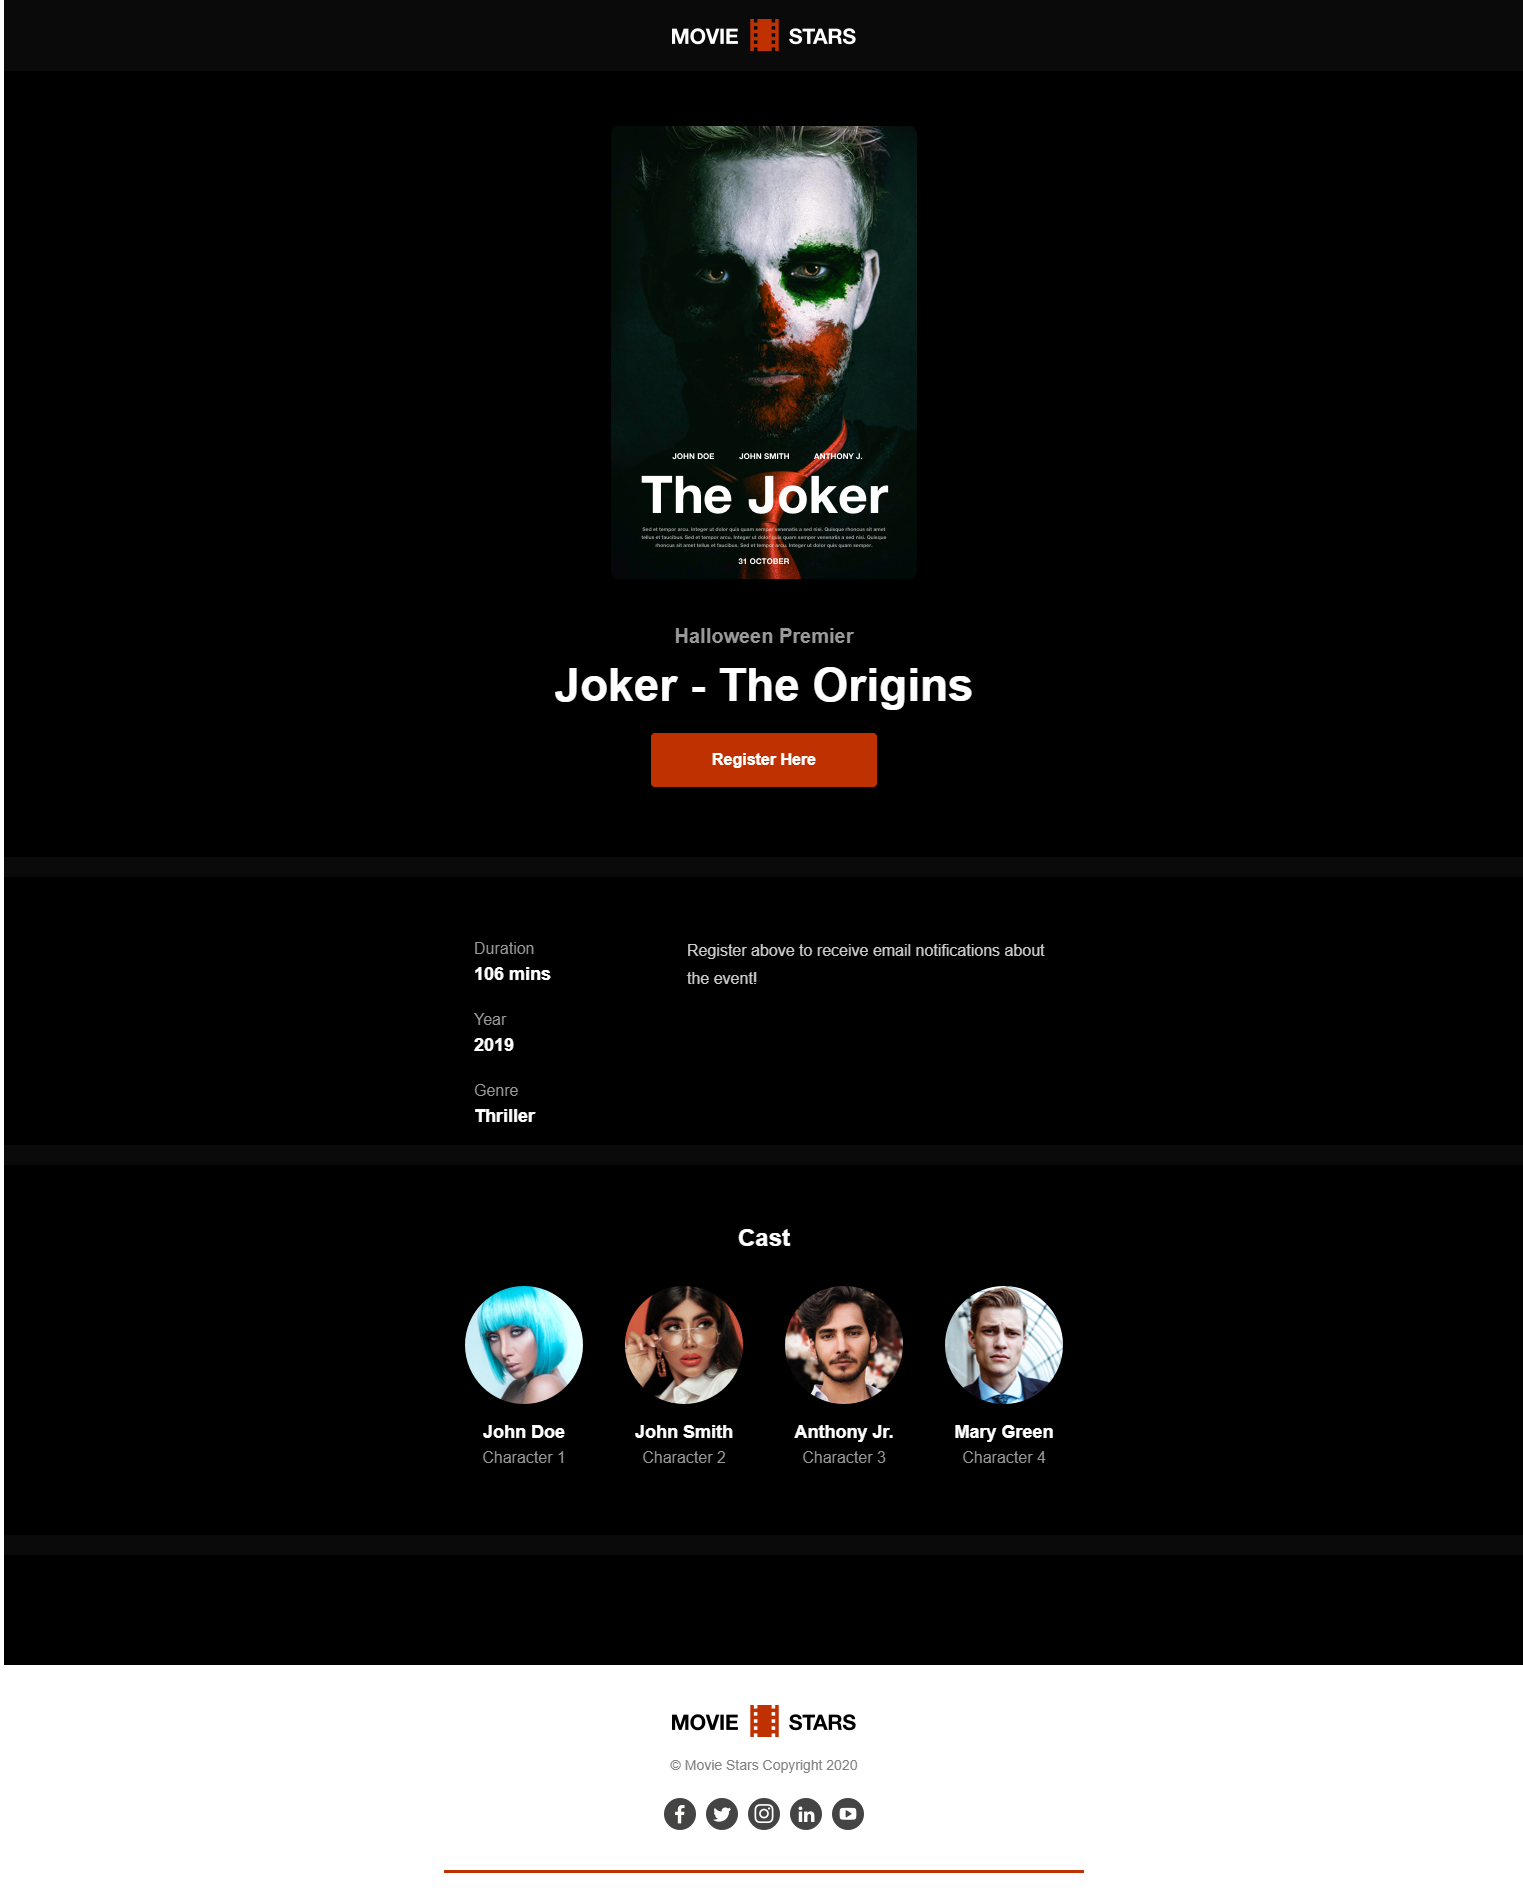
Now your landing page is published and connected with your email, and your email campaign is ready to be sent. When people receive your email, they’ll be able to click on the CTA to go to the landing page and complete the Google form.
Wrap-up: Free email marketing software
BEE’s free email marketing templates are the perfect way to create your next email campaign. By using BEE and other free tools such as Google Forms, you have an affordable method of making emails that will get conversions and help your business. Happy designing!
Your Two-Step Guide to Connecting Klaviyo With BEE
Tools like the BEE email editor and Klaviyo are an email marketer’s best friend: They save you time and effort as you work to reach a wider audience and get more engagement with your email campaigns. Now, you can connect your Klaviyo account with BEE to easily create emails using the two platforms. Here’s how!https://youtu.be/xWVePKWIxEw
Why use Klaviyo with BEE?
If you aren’t familiar with Klaviyo, it's an email automation platform that’s especially ideal for e-commerce companies. Klaviyo supports your email marketing efforts by helping you analyze website data so you can send relevant, highly targeted email campaigns. When it comes to Klaviyo vs. MailChimp, the two platforms are comparable, but Klaviyo offers more built-in features — including a free account option that lets you send up to 500 emails with 250 contacts. Klaviyo can integrate with several other platforms, including Shopify, Stripe, and BEE.BEE is a drag-and-drop email design tool that allows you to easily create and customizestunning email campaigns. Its extensive catalog of free email templates are easy to use, with plenty of options for integrating your own branding and designs. Once you’ve finished creating an email, you can export it to any number of email service providers — including the Klaviyo software. Here is your easy, two-step guide to connecting your Klaviyo account with BEE. (The Klaviyo connector is only available for BEE Pro, so start your free two-week trial here if you need it.)
How to integrate Klaviyo
There are two processes you can follow to connect your Klaviyo account with your BEE account. Before you can begin either one, however, you’ll need to get an API key from Klaviyo.
Step #1: Retrieve your Klaviyo API key
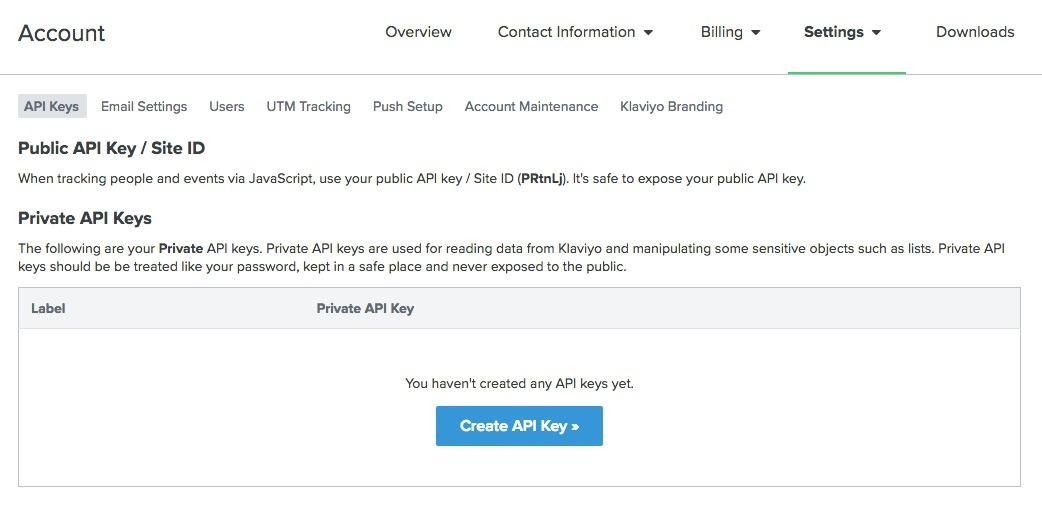
From your Klaviyo dashboard, click “Account,” “Settings,” and “API Keys.” From there, you can create an API key by typing in a label and then manually copying the key. Now, you’re ready to head over to your BEE account and connect the two.
Step #2: Connect via BEE settings
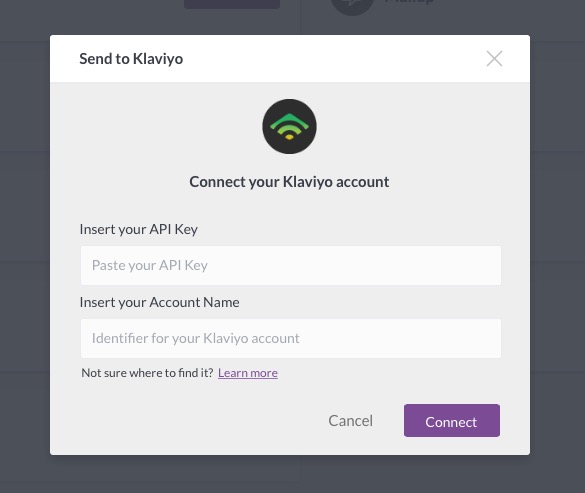
Open your BEE account and go to “Settings,” then “Connectors.” Click on Klaviyo, and then paste your API key into the pop-up. (You’ll also be asked for your Klaviyo account name, but if you don’t know this, don’t worry — it’s not mandatory.) Click “Connect,” and you’re good to go! Your accounts are now connected.
If you want to export just a single template to Klaviyo, you can do that, too. Here’s how:
Step #1: Export your message
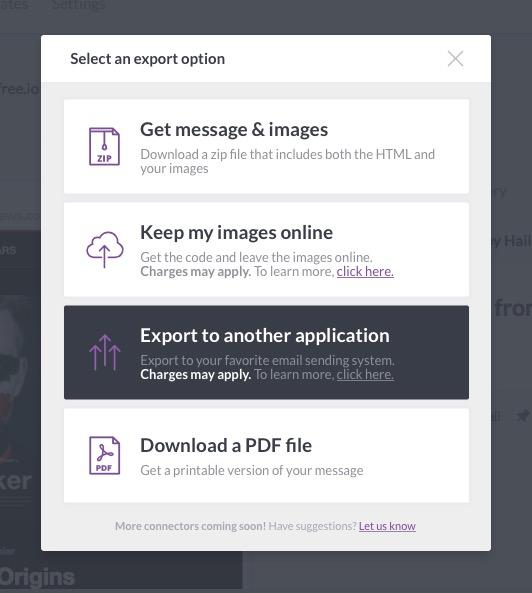
Create an email message in BEE. When it’s ready, click “Export Message” on the message details page and then select “Export to another application.”
Step #2: Choose Klaviyo
Choose Klaviyo from the list of options. If you’ve already connected your accounts via Settings, all you’ll have to do is click “Create campaign;” otherwise, you’ll need to paste your API key into the pop-up during this step. After that, you’ll be able to find your BEE email template in your Klaviyo account and send it from there!
Wrap-up: Connect Klaviyo with BEE
By connecting Klaviyo with BEE in this simple two-step process, you can create beautiful email templates in BEE and then send those email campaigns using Klaviyo. Connecting your accounts can save you time as you create beautiful and effective emails to market your brand. Happy designing!
How To Integrate Constant Contact With the BEE Email Editor
Constant Contact is a popular email service provider, and for good reason: It’s a powerful tool that can be used to automate and send your emails. And now, you can create stunning emails using the BEE editor and then export them to Constant Contact. Here’s your guide to how to integrate Constant Contact with your BEE account.https://www.youtube.com/watch?v=4xyuQrhzK88
Why Constant Contact?
Constant Contact is an email service provider that has several benefits for marketers. The platform makes it easy to send emails and track how they’re performing. And Constant Contact pricing is also affordable, with a basic plan starting at just $20 per month.The BEE email editor is another great tool for any business. Simple to use, BEE can help you create beautiful, personalized emails that are ready to go out to your list in a matter of minutes, helping you save time and win more conversions. Now, BEE has rolled out a Constant Contact connector so you can export your BEE emails into Constant Contact, and get the best of both worlds!Be aware that the Constant Contact connector is only available for BEE team and agency members — so if you have a free account with BEE, you’ll need to upgrade to take full advantage. Click here to start your free two-week trial (no credit card required). If your account is already good to go, let’s get into how to integrate Constant Contact with BEE.
How to Integrate Constant Contact: Method #1
There are two methods of connecting the Constant Contact service with BEE. Here’s method #1.
Step #1: Go to Settings
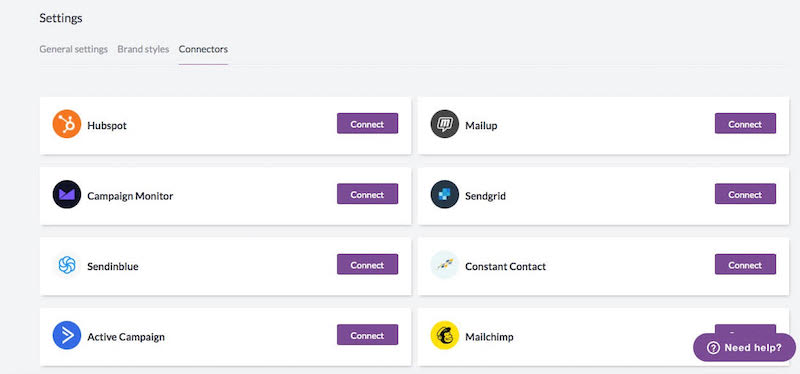
From your BEE dashboard, navigate to “Settings” and then click “Connectors.” Scroll through the list of options until you see Constant Contact. Click the purple “Connect” button next to the Constant Contact service.
Step #2: Log in to Constant Contact
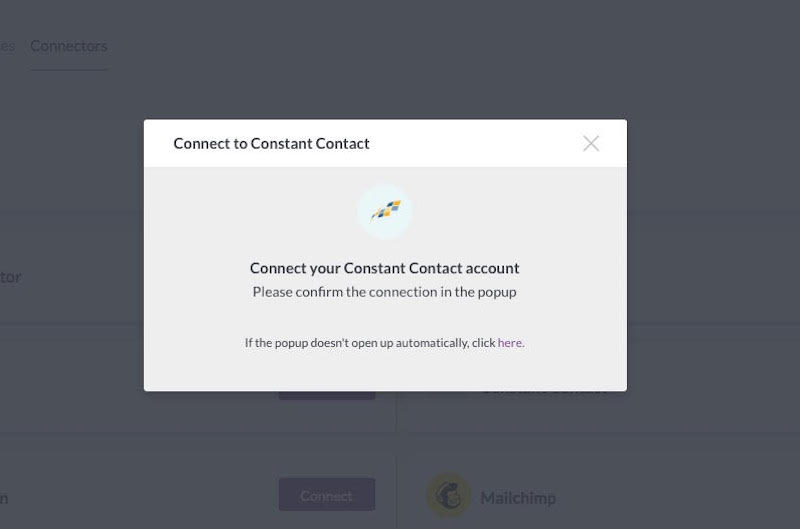
When you click “Connect,” you’ll see a pop-up that asks you to connect your Constant Contact account. One of two things will happen next: You may see an additional pop-up that asks if you’ll allow the BEE Connector permission to read your account data (in which case, your Constant Contact account will connect automatically). If not, you’ll see a pop-up in which you have to manually type in your Constant Contact username and password. Either way, you’re in!
Pro tip: If you design emails for multiple clients, look into getting a BEE Pro Agency subscription. With this type of subscription, you can connect to multiple Constant Contact accounts and manage them separately, making it easy to switch between different accounts.
Method #2
There’s one more method you can use to jumpstart your Constant Contact export campaigns. Here’s how.
Step #1: Export message
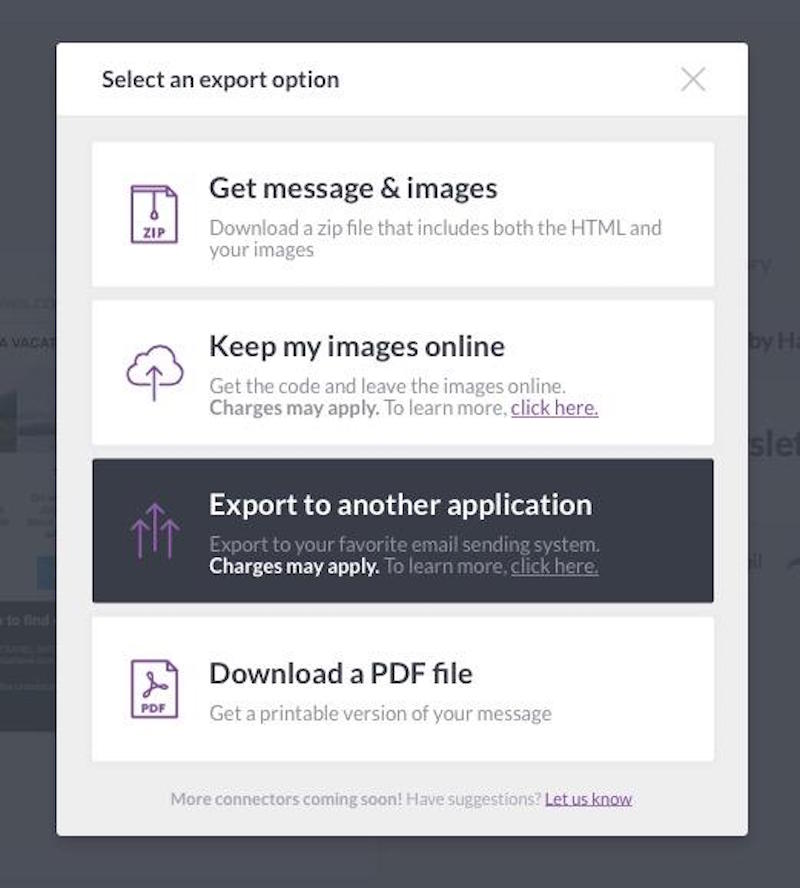
If you’re working on an email inside the BEE editor, you’ll see a purple “Export message” button on the Message Details page when it’s done. Click that button and then choose “Export to another application” from the pop-up.
Step #2: Select a verified email
Choose Constant Contact from the list of options and, if you haven’t already logged in under Settings, follow the steps to log into your Constant Contact account. Next, choose one of the “Verified Emails” from your Constant Contact account. You can set that email as the “sender/reply email” for your campaign. (If you choose the wrong one, don’t worry — you can tweak this later from within Constant Contact.) And that’s it!
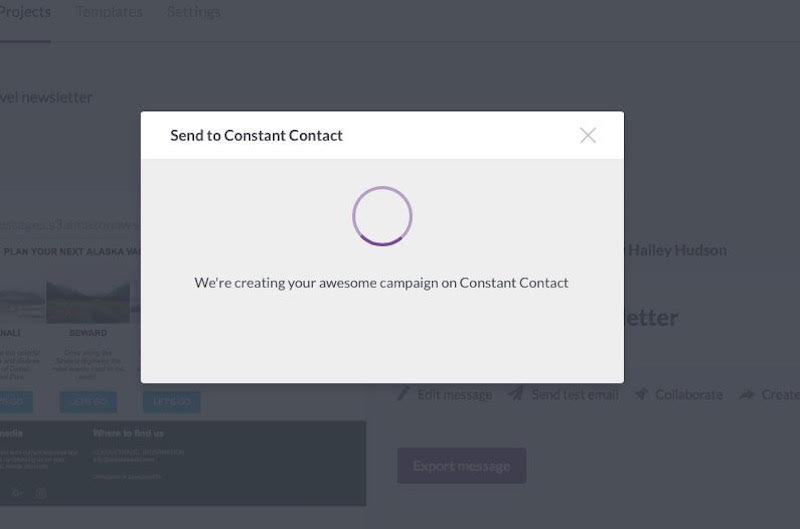
Wrap-Up: Constant Contact Integration
Now that your accounts are connected, you can create email templates within the BEE editor and then export those templates to Constant Contact, enjoying the benefits of both platforms as you send emails to your list. Sign up for a free trial of BEE Pro if you need it and start designing today!
How to Use Sendinblue With BEE Email Templates
Are you part of the more than 80,000 companies using Sendinblue email marketing worldwide? If so, we have good news: BEE recently rolled out a connector that will link your Sendinblue mailing list with BEE’s email templates. This Sendinblue tutorial will walk you through how to get the connector up and running. More good news: It should take you less than two minutes!https://www.youtube.com/watch?v=lGp2fk_6Edo
Why use Sendinblue with BEE?
Sendinblue is an email marketing automation software that has a lot of benefits for marketers. The platform’s workflow templates allow you to save time and build a strong email list; Sendinblue also offers smart scheduling tools and helps you analyze your email campaign statistics.Now you can connect Sendinblue with your BEE account just like you’d connect your Mailchimp or SendGrid accounts. This way, you can use BEE’s responsive email templates to create beautiful email newsletters, and then export those newsletters to Sendinblue to shoot them off from there.Here’s how to connect your Sendinblue and BEE Pro accounts:
Step-by-step guide: Connecting your accounts
You have two options for exporting templates to Sendinblue — either connect your accounts now so they’re ready to go the next time you design a BEE template, or wait and connect them when you're ready to send a template to your Sendinblue dashboard. To connect the two accounts before you begin designing, follow these steps:
Step #1: Create an API key in Sendinblue
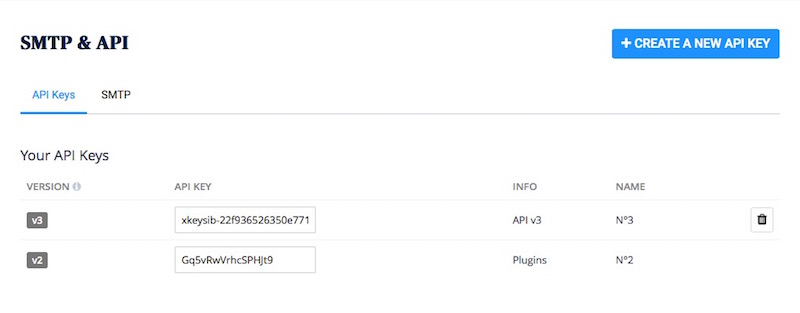
From your Sendinblue dashboard, click “SMTP & API” on the left-hand sidebar and your API keys will pop up. Copy the API v3 key.
Step #2: Connect
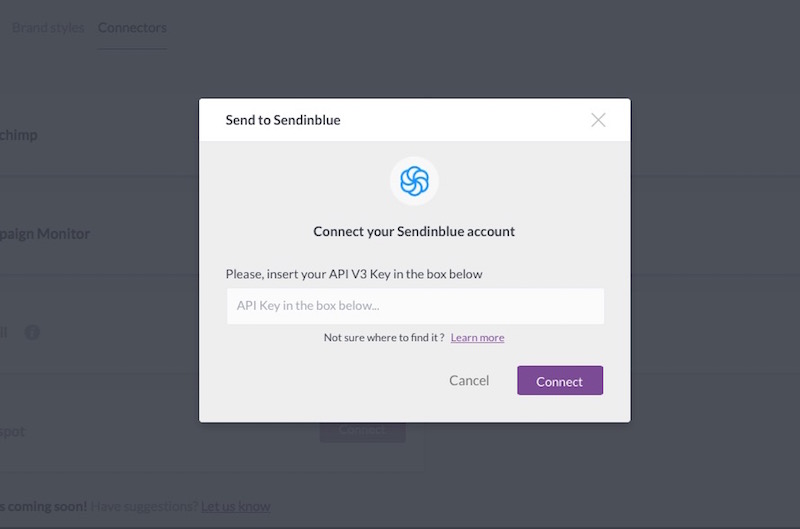
From inside your BEE Pro account, enter your settings and click on Connectors. You’ll see an option for Sendinblue. Click connect and paste your API key into the text box, and that’s it! You’ve connected your BEE account to Sendinblue.
Step-by-step guide: Exporting templates
If you have a single template you want to export to Sendinblue, here’s how:
Step #1: Export message
After you create a template, go to the message details page and click “Export message.” From the list of export options, select “Export to another application.”
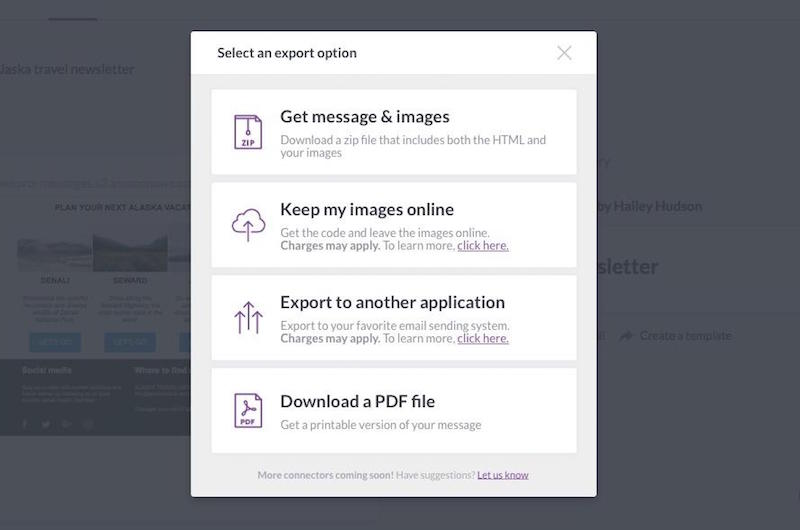
Step #2: Connect
Choose Sendinblue from the list of connectors and follow the steps to connect. You’ll then be able to find the email on your Sendinblue dashboard.
Wrap-up: Send BEE emails with Sendinblue
If you don’t already have BEE Pro, get a free trial to use our drag-and-drop email design tools and customizable templates with your Sendinblue email marketing!
Campaign Monitor Custom Templates Now Available with BEE
Email marketers, do you use Campaign Monitor to target audience segments and build customer journeys? You can now build Campaign Monitor custom templates with the BEE email editor. It's an amazing way to marry BEE's user-friendly design tools with the campaign management capabilities of Campaign Monitor. Read on to learn how to link your accounts and get the best of both worlds!https://www.youtube.com/watch?v=xn9l8CRUOQk
Why use Campaign Monitor and BEE together?
Campaign Monitor and BEE both have a lot of email marketing benefits. Campaign Monitor helps you optimize email campaigns by tracking email performance in real time, and it’s simple to automate your campaigns, too. When you pair Campaign Monitor with BEE’s drag-and-drop email editor, you can create beautiful emails in BEE and send them using Campaign Monitor’s email automation feature.Here’s a step-by-step guide to the simple process of connecting email marketing software Campaign Monitor with BEE Pro.
Step-by-step guide: Connecting Campaign Monitor with BEE
Connecting your accounts is quick and painless. Here’s how:
Step #1: Go to settings
From inside your BEE Pro account, click on “Settings” and then “Connectors.” You’ll see a list of several connector options with Campaign Monitor in the left column. Click the purple “Connect” button by Campaign Monitor’s name.
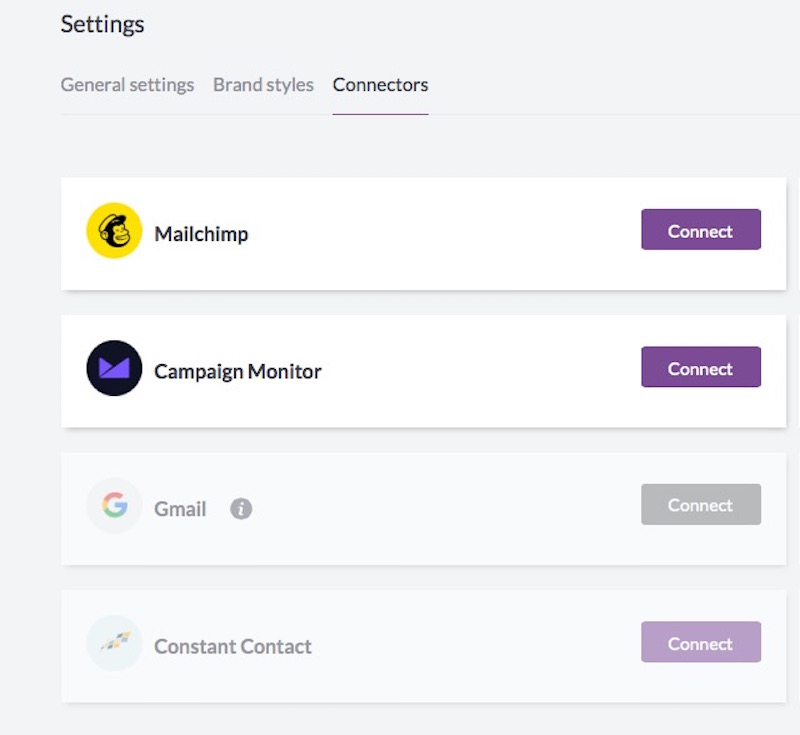
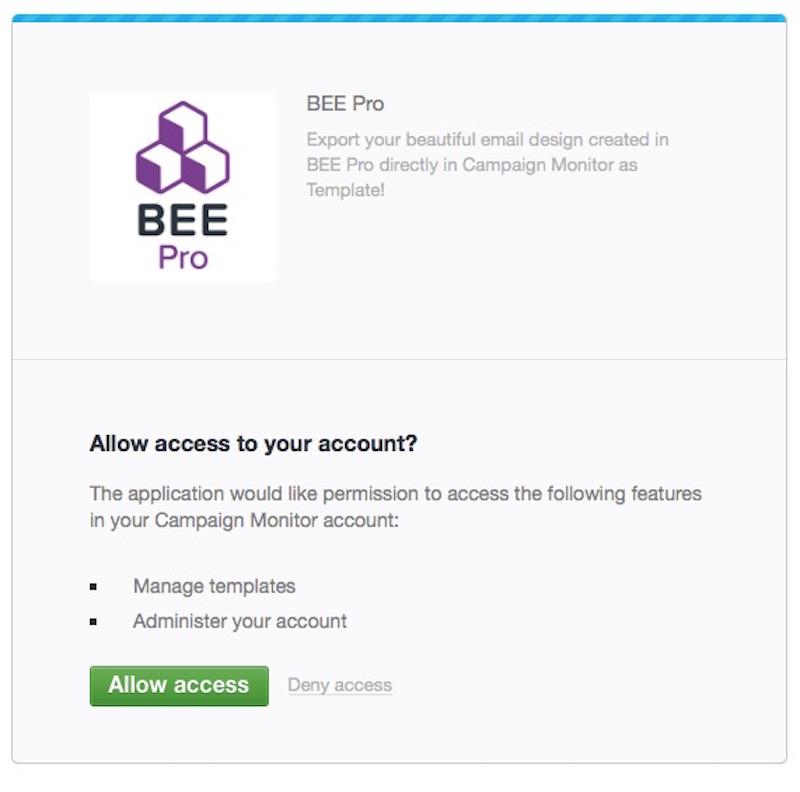
Step #2: Allow access
A window will pop up that prompts you to log in to your Campaign Monitor account. After you type in your email and password, you’ll be asked if you want to allow access; click “Allow” and your accounts will connect.
Exporting one template to Campaign Monitor
You also have the option to export a single template to your Campaign Monitor dashboard — here’s how.
Step #1: Create a template with the correct syntax
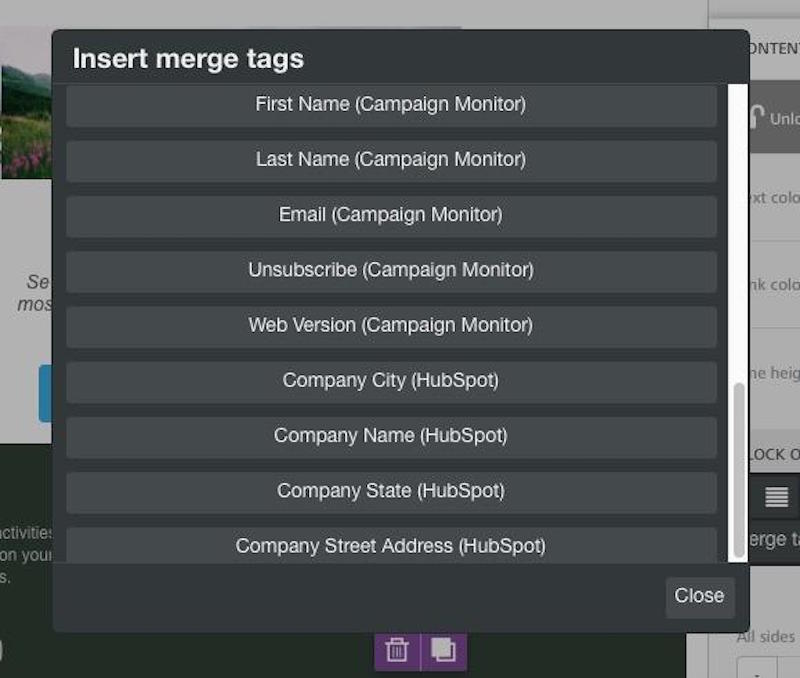
In order to send your BEE template to your Campaign Monitor account, your email template must have the <unsubscribe>Unsubscribe</unsubscribe> syntax. You can add this syntax in the BEE Pro editor by choosing a location where you want to have an unsubscribe link. Add a text block and click on “Merge Tags;” next, choose “Unsubscribe (Campaign Monitor)” from the list of options. (It’s important to make sure you add this syntax through “Insert Merge Tag” and not type it in yourself, or Campaign Monitor won’t accept the template.)
Step #2: Go to message details
After creating and saving an email template with the required syntax, go to the “Message Details” page and click the purple “Export Message” button. Choose the option to export to another application. Select Campaign Monitor from the available choices, and then log in and connect. That will export your BEE email template to your Campaign Monitor account.

Wrap-up: Campaign Monitor Custom Templates
If you have multiple customers or clients and they each have their own Campaign Monitor account, check out BEE’s Pro Agency account. This type of account supports multiple Campaign Monitor accounts and lets you have one for each brand. Happy designing!

How to Create Your Own Email Template So You Can Stay On-Brand Every Time
Have you had your coffee today? Or, perhaps more importantly, have you sent out a marketing email today? In honor of International Coffee Day coming up on September 29th, we’re going to take an email from a coffee company and show you how to create your own email template in the BEE editor, making a top-notch brand email that your customers will want to read. Let’s get started!https://www.youtube.com/watch?v=buOlXJMgYC0
Coffee/food email inspiration:
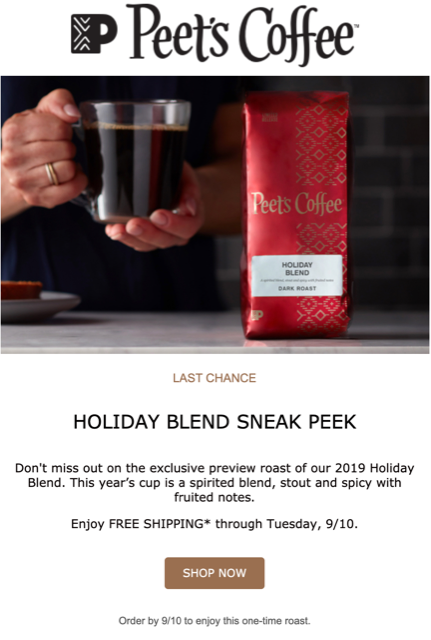
We loved this recent brand email from Peet’s Coffee, a popular coffee roaster and retailer based out of San Francisco. The email was advertising a sneak peek of the company’s upcoming holiday roasts:Subject line: 2 days left for 2 amazing coffees
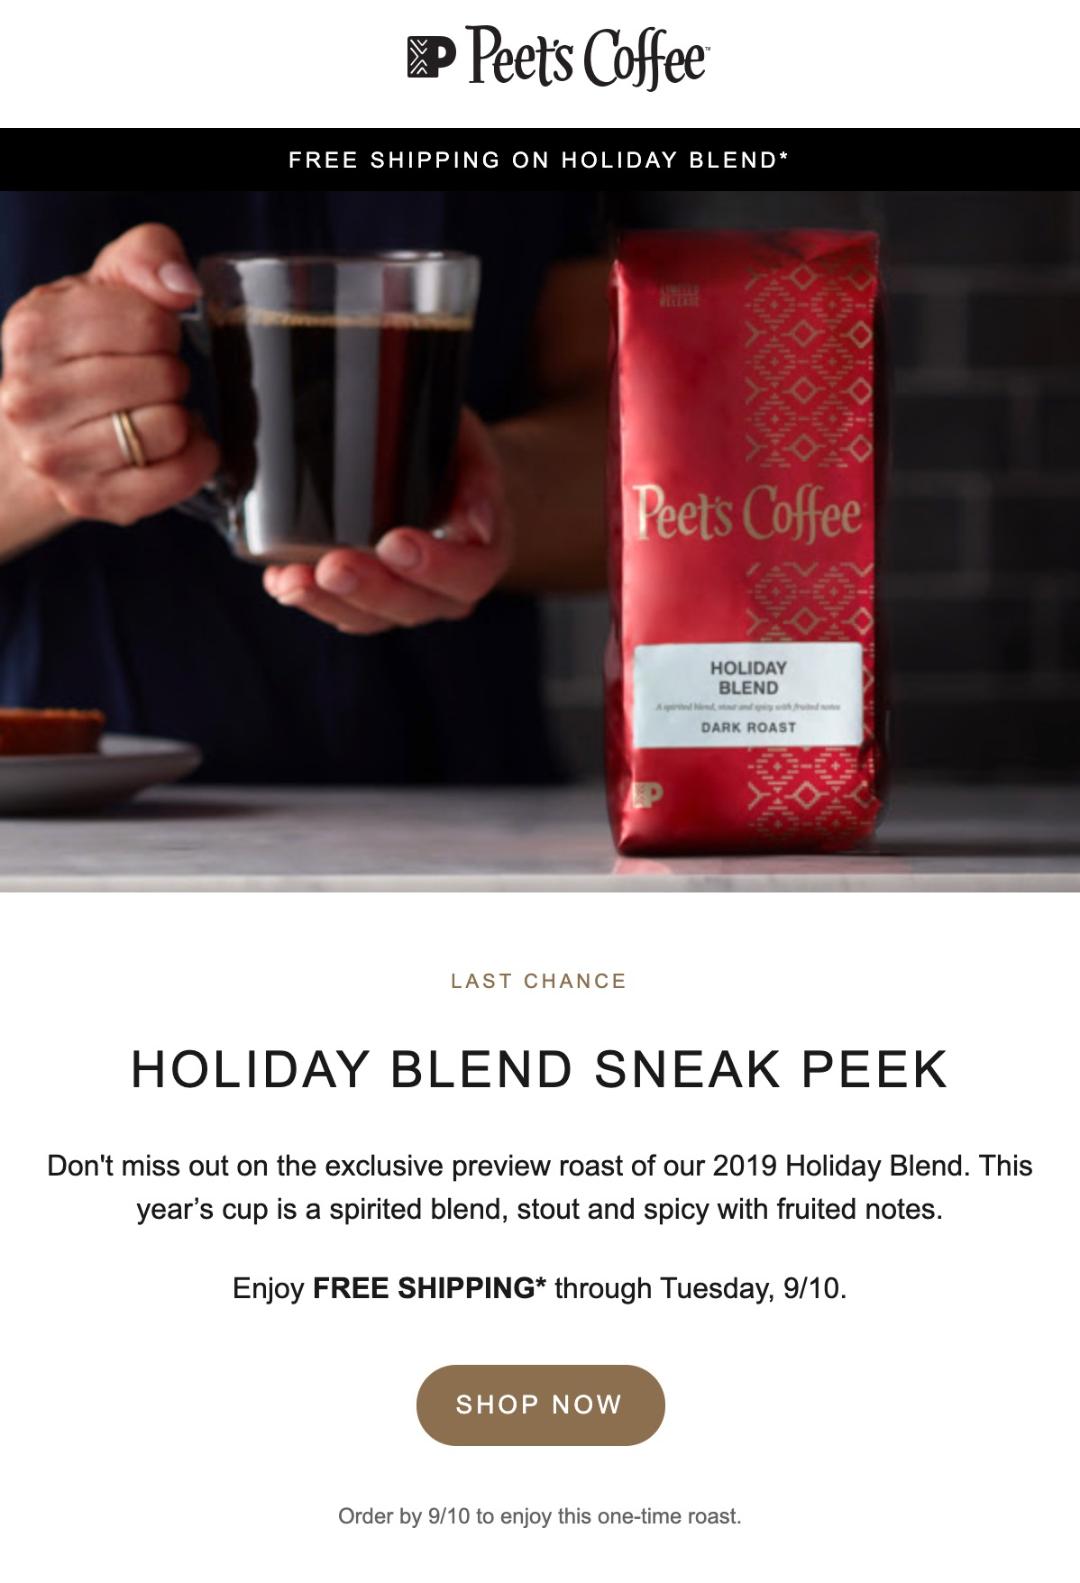
The email has a high-quality photo and creates a sense of urgency by telling readers it’s their last chance to get free shipping. The template is simple, not cluttered, making it easy to understand the email and opt-in to the offer; the design of the email also evokes a holiday feel with tones of red and gold.Let’s jump into the BEE Pro editor and recreate this coffee email using a build-your-own email marketing template.
Tutorial: create your own email template in minutes
Step #1: Open a blank template
Go into BEE’s template library and select a blank template. With this email marketing template, you can build an email from the ground up to make sure it’s completely tailored for your brand. Grab a BEE Pro trial if you need it (two weeks free, no credit card needed) and you’re ready to start from scratch with this blank template.
Step #2: Add placeholders
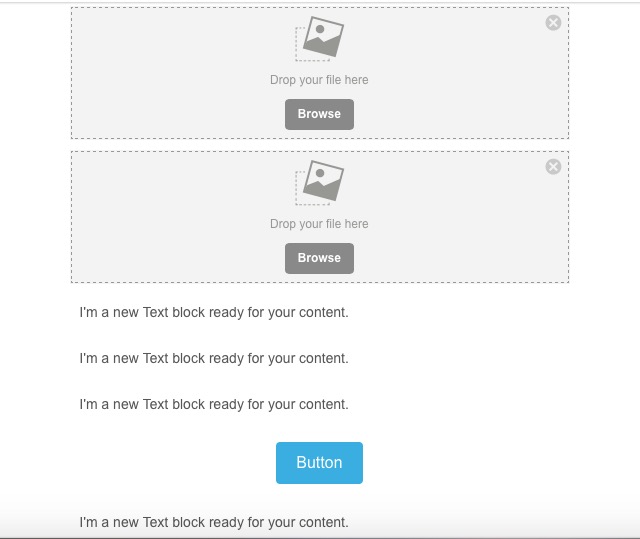
Next we’re going to drag-and-drop placeholders before we add the actual images and text. The first step here is to look under the “Rows” tab on the right, select “Empty” from the drop-down menu, and add seven total basic rows. Then we’re going to toggle back to the “Content” tab and add two image placeholders for the header and photo, three text placeholders to accommodate the three different fonts used in the body text, a CTA button, and one final text placeholder for the last line of text.
Step #3: Add photos and text
Now the email structure is all ready and we’re prepared to create the email template. First, add some images by searching BEE’s library of free images or uploading your own. Next it’s time to add the text; type in what you want to say and adjust the font, color, and size accordingly.
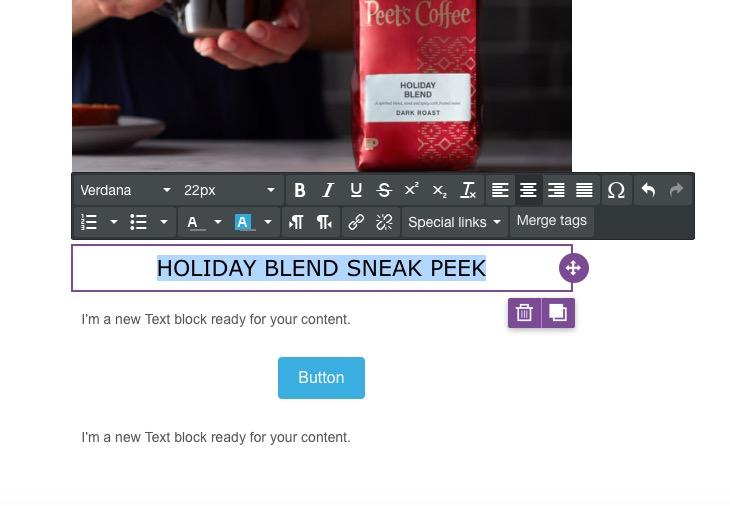
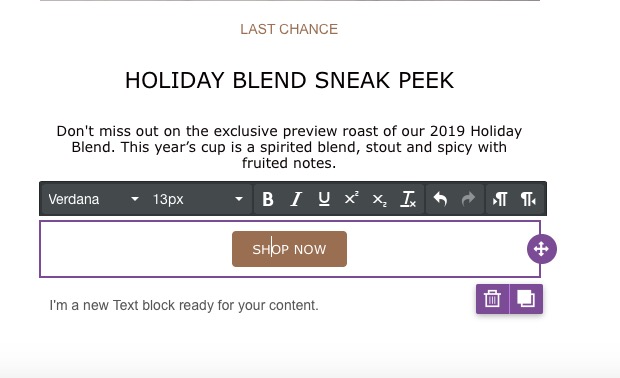
Finally, you can edit the CTA button text by typing right onto the button. On the right, we can further customize the button by adding the URL it will link to, plus adjusting the color and alignment of the button if desired.
Step #4: Save rows
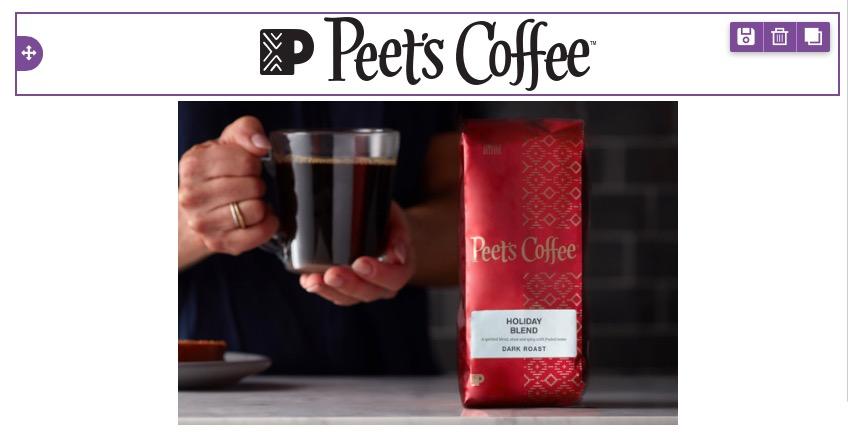
BEE recently came out with a new feature, Save Rows, that can help you save time and stay on-brand as you create your own email template. When you click on a section, you’ll see a “Save” icon; it’s the button to the left of the trash can. If you click that button, you can type in a name and save that row for later, like we did here with the Peet’s Coffee header.
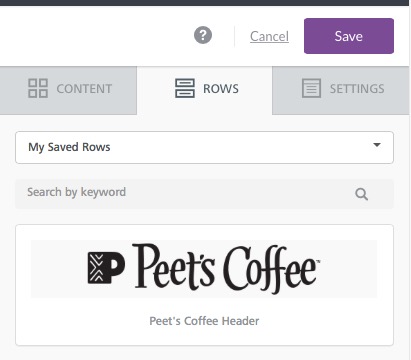
Next time you’re ready to create an email, you can go to the “Rows” tab on the right sidebar and click on the drop-down list. All of your previous designs will be under “My saved rows.” Instead of starting from scratch every time, Save Rows makes it possible for you to create your own email template that’s consistently in line with your branding. Your header and your footer are two important sections you’ll want to save, because although the rest of your email will vary, those two parts will usually always be the same.
Step #5: You’re done!
And that’s it — we just recreated Peet’s Coffee's holiday roast email! When you’re done creating an email template, just click “Save” in the upper right-hand corner of the editor and add the email to your template library. You can also preview your email on desktop and mobile, send a test email, or export to Gmail.
Wrap-up: Create your own email template
Now that you’ve seen how it works, it’s time for you to create your own email template in BEE. Remember, you can get a free trial of BEE Pro if you need it — click here for the simple sign-up process. And with the new Save Rows feature, it’s easier than ever to consistently produce on-brand emails with BEE, dragging and dropping the same design elements every time. Happy designing!
How to Create an HTML Email in Less Than 2 Minutes
Want to send a beautifully formatted, dynamic email? One with background colors, photos, and bulletproof buttons? Then you'll need to create an HTML email! And it doesn't have to be hard. In fact, you can build one in less than 2 minutes with an HTML email template or from scratch using a drag-and-drop editor—no coding required. Today we'll show you how. Keep reading!
First, what is an HTML email?
HTML emails can contain images, graphics, and colors that are formatted to look lovely in your inbox. Nearly all of the emails you receive from brands (i.e., the ones that aren't from your mom) are HTML emails. HTML stands for hypertext markup language, and these emailsare commonly considered the opposite of plain text emails because they have design elements we're used to seeing in promotional emails and newsletters.
A great HTML email is:
- Fully responsive across devices (phone, iPad, laptop screen, etc.)
- Supported by major email clients and applications (Gmail, Apple Mail, Outlook, Yahoo!, etc.)
- Well designed and eye-catching (with art, borders, buttons, etc.)
Ready to build one in minutes? Read on for our quick and easy HTML email tutorial.
Create an HTML email in minutes
Want to build an HTML email? You have a few options. If you're a coding pro, you can build one line by line. But you don't have to code to create a stunning, sophisticated HTML email. You can use an email editor like BEE to customize an HTML template or build an HTML email from scratch using the drag-and-drop tool.In other words, any email you build in BEE, whether it's from a template or from scratch, will be an HTML email that's mobile responsive, compatible with major email clients, and beautiful!Here's how!
Option 1: Start with a BEE HTML template
Go tobeefree.io/templatesto scan through more than 200 professional HTML templatesto get started. You don’t need to register or log in to use the editor, and all the templates are free. (Check the “free” filter in the navigation bar). You can filter by industry, purpose/occasion, or search by tag to find the template that’s perfect for you—fromnewsletter templatestoevent promotion templates. Or of course you can just scroll and browse.
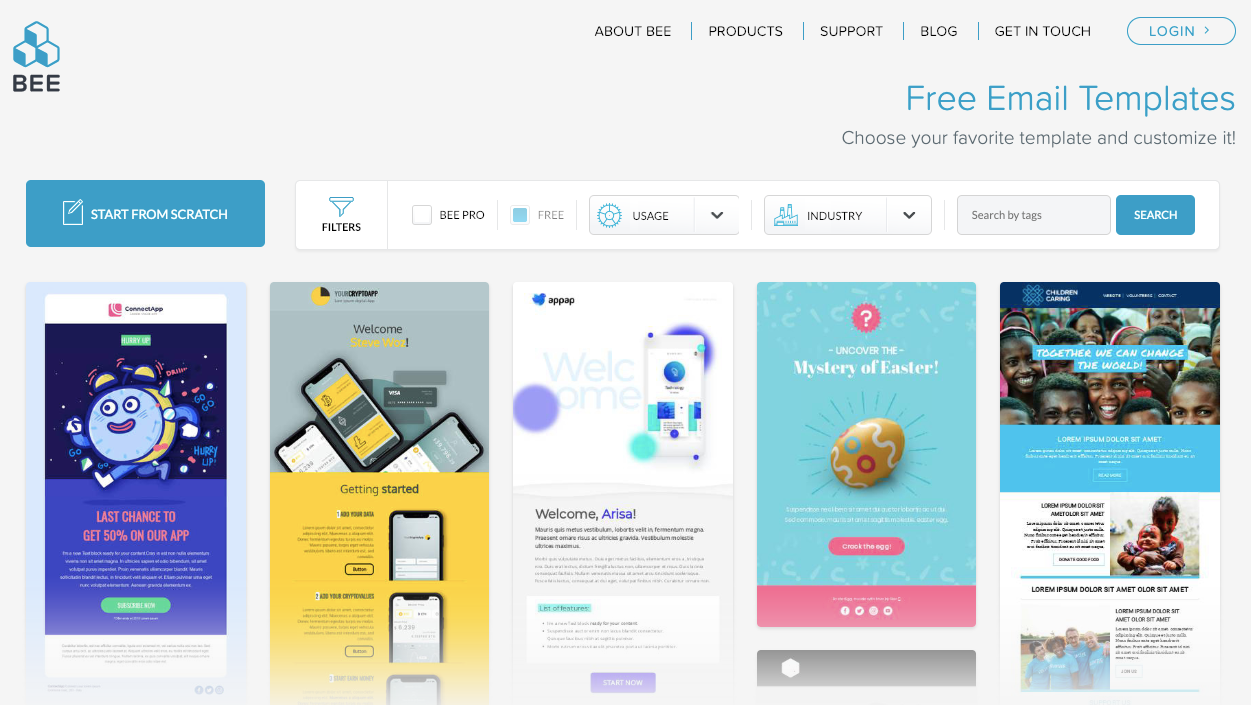
Whichever HTML template you select – whether simple or more ornate – you cancompletely customize it. Add your own text andimages; change the fonts and font sizes; update the CTA button color and size, and more.Here are some resources for customizing your template:
- Transform a BEE template into a perfectly on-brand customer email
- Choose the best template for your email in minutes
- How to use the BEE templates for Gmail add-on to create HTML templates right inside your Gmail account
Option 2: Build an HTML email from scratch in BEE
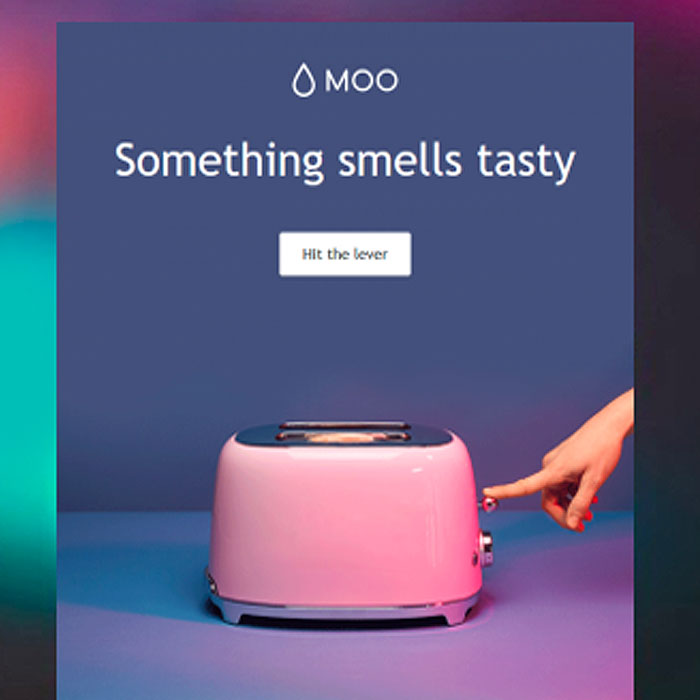
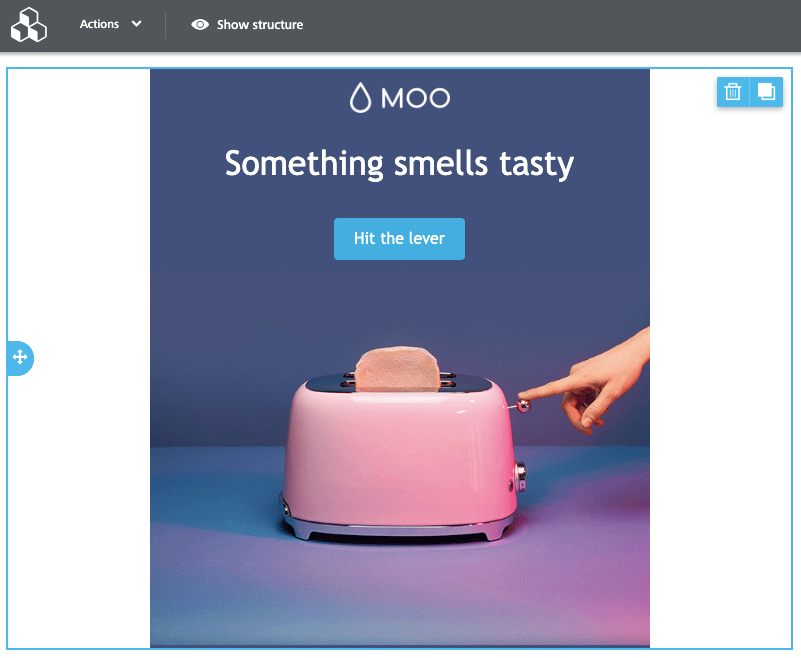
Want to start creating from scratch? We can do that too! Let's say we want to build a stunning, simple HTML email like this one we recently received from the print company MOO—
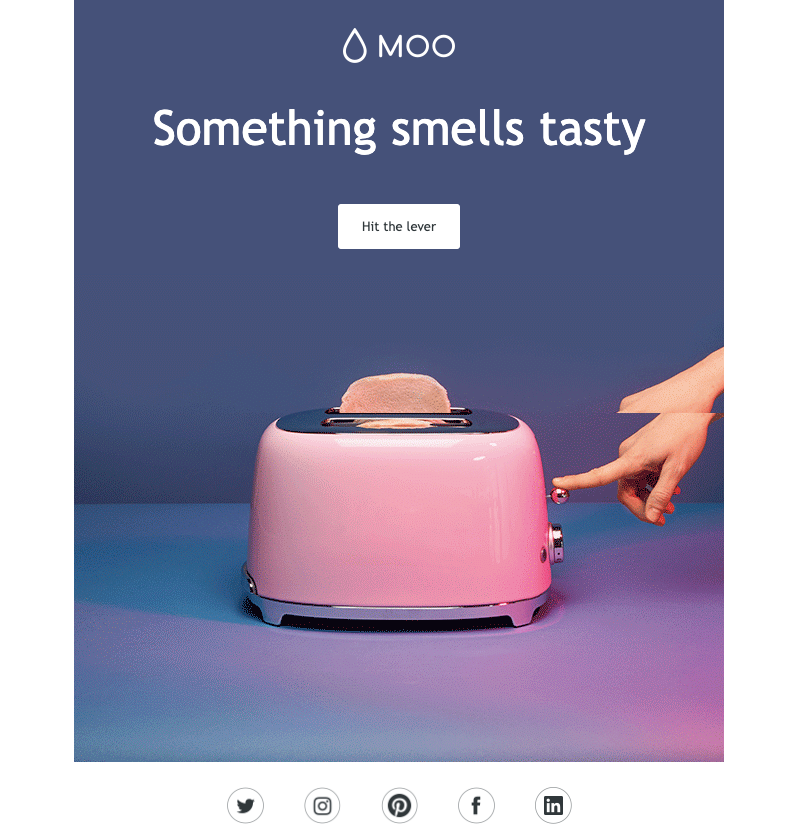
It's engaging, mysterious, and super fun to look at. Plus, the basic structure—opener text, CTA, image—is one that can be used for almost any kind of email. And check out the GIF!

We'll start by going to beefree.io (or pro.beefree.io for the pro users) and selecting Start from Scratch.
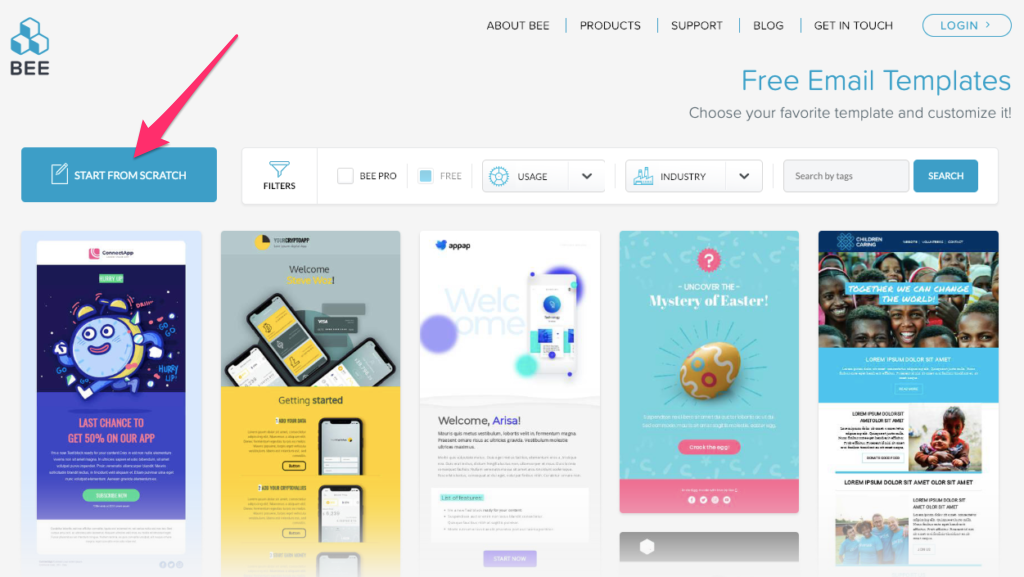
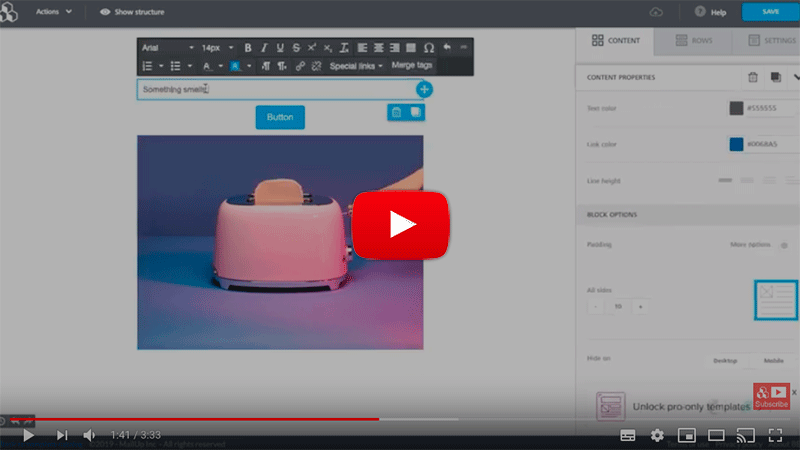
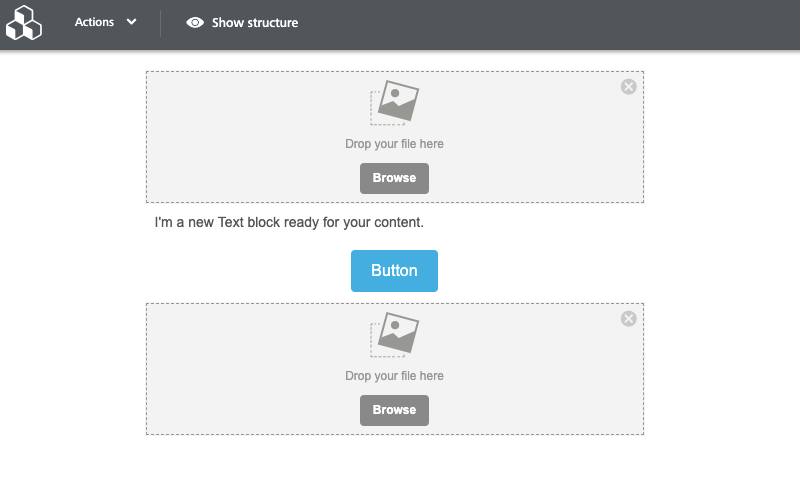
Then with our lovely blank canvas, we can begin building. Let's first drag in placeholders for our content. The main body of the email has a layout that flows from image (logo) to header text to CTA button to image (that great animated GIF). We'll pull in those elements from the Content menu on the right, so our structure looks like this:
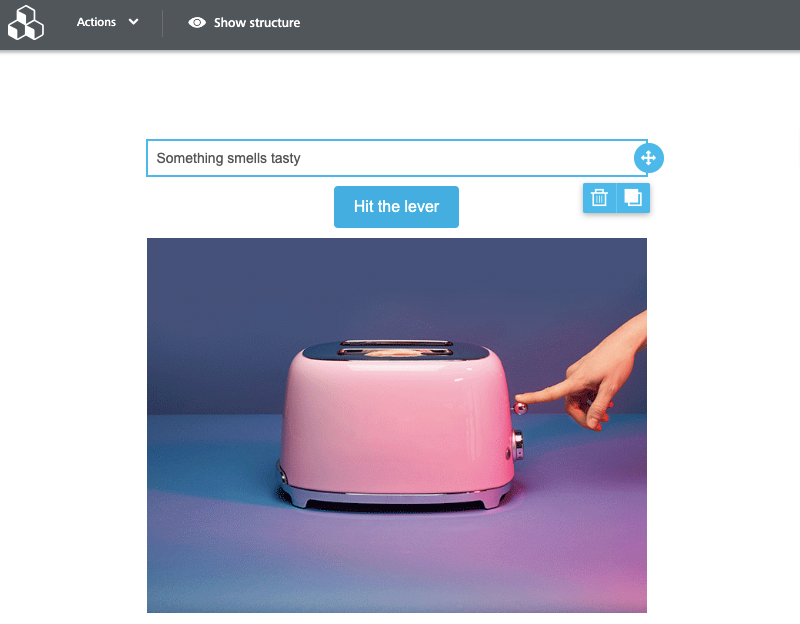
Next we'll drop in our images and update the text—including on our CTA button.
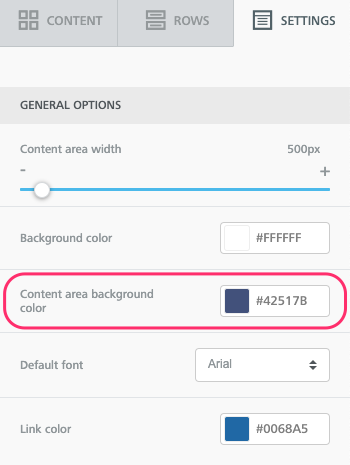
We need a background color! Use an HTML color code matcher like this one to get just the right hue (it's how we seamlessly arrange HTML background colors alongside images). Paste in your color code (or select the shade you want to use) in the Settings menu.
Lastly, we'll adjust the font (choosing the email-friendly Trebuchet), adjust the paddingaround images a bit, link our CTA button and images, and that's it! Our email is ready to roll.
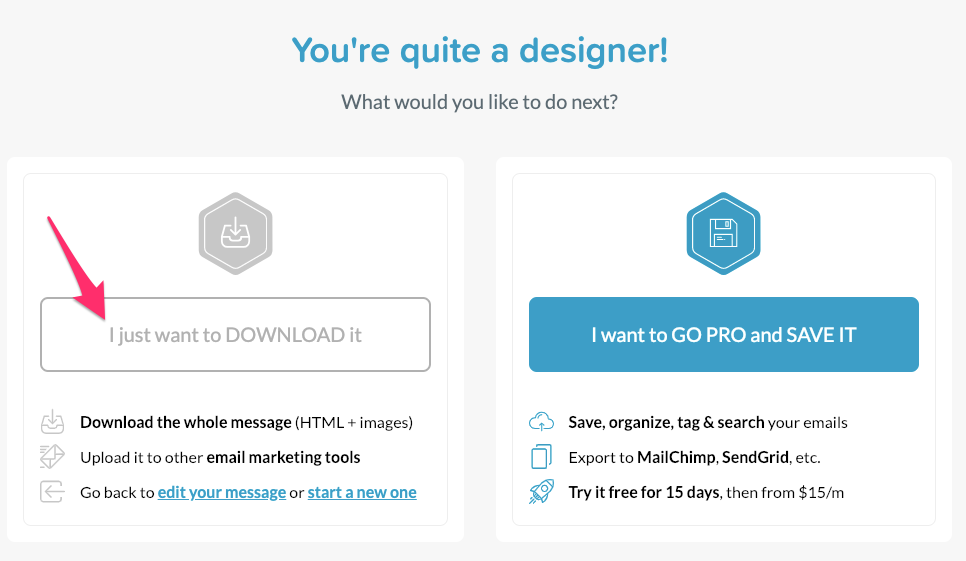
Now that we're ready to send, we can simply click the Save button in the upper right corner, then download the HTML email.
Your downloaded message will contain a zipped file with the HTML and images, which you can import to the email client of your choosing.Here's a look at the contents of the zip file—

And when we look at the email itself, here's the HTML code behind what we built—
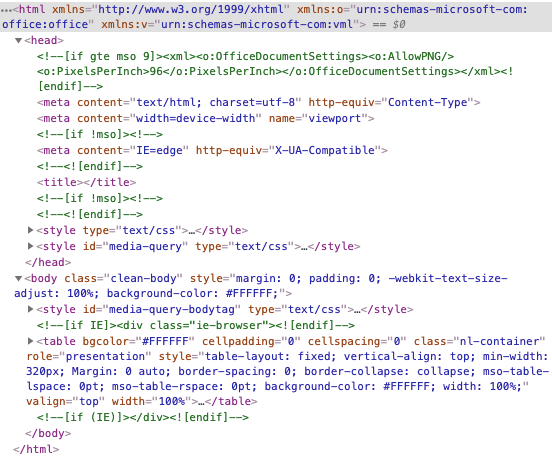
With BEE Pro, you can also save any email you create as a template that you can use time and again. That means BEE can basically be your go-toHTML email template builder, allowing you to save time and maintain design consistency across emails. And don't forget our library of ready-made templates that can be customized with your brand visuals.Try a free BEE Pro trial and get designing right away!
Tutorial: How to Use BEE's Free Mailchimp Templates to Create a Stunning Email Campaign
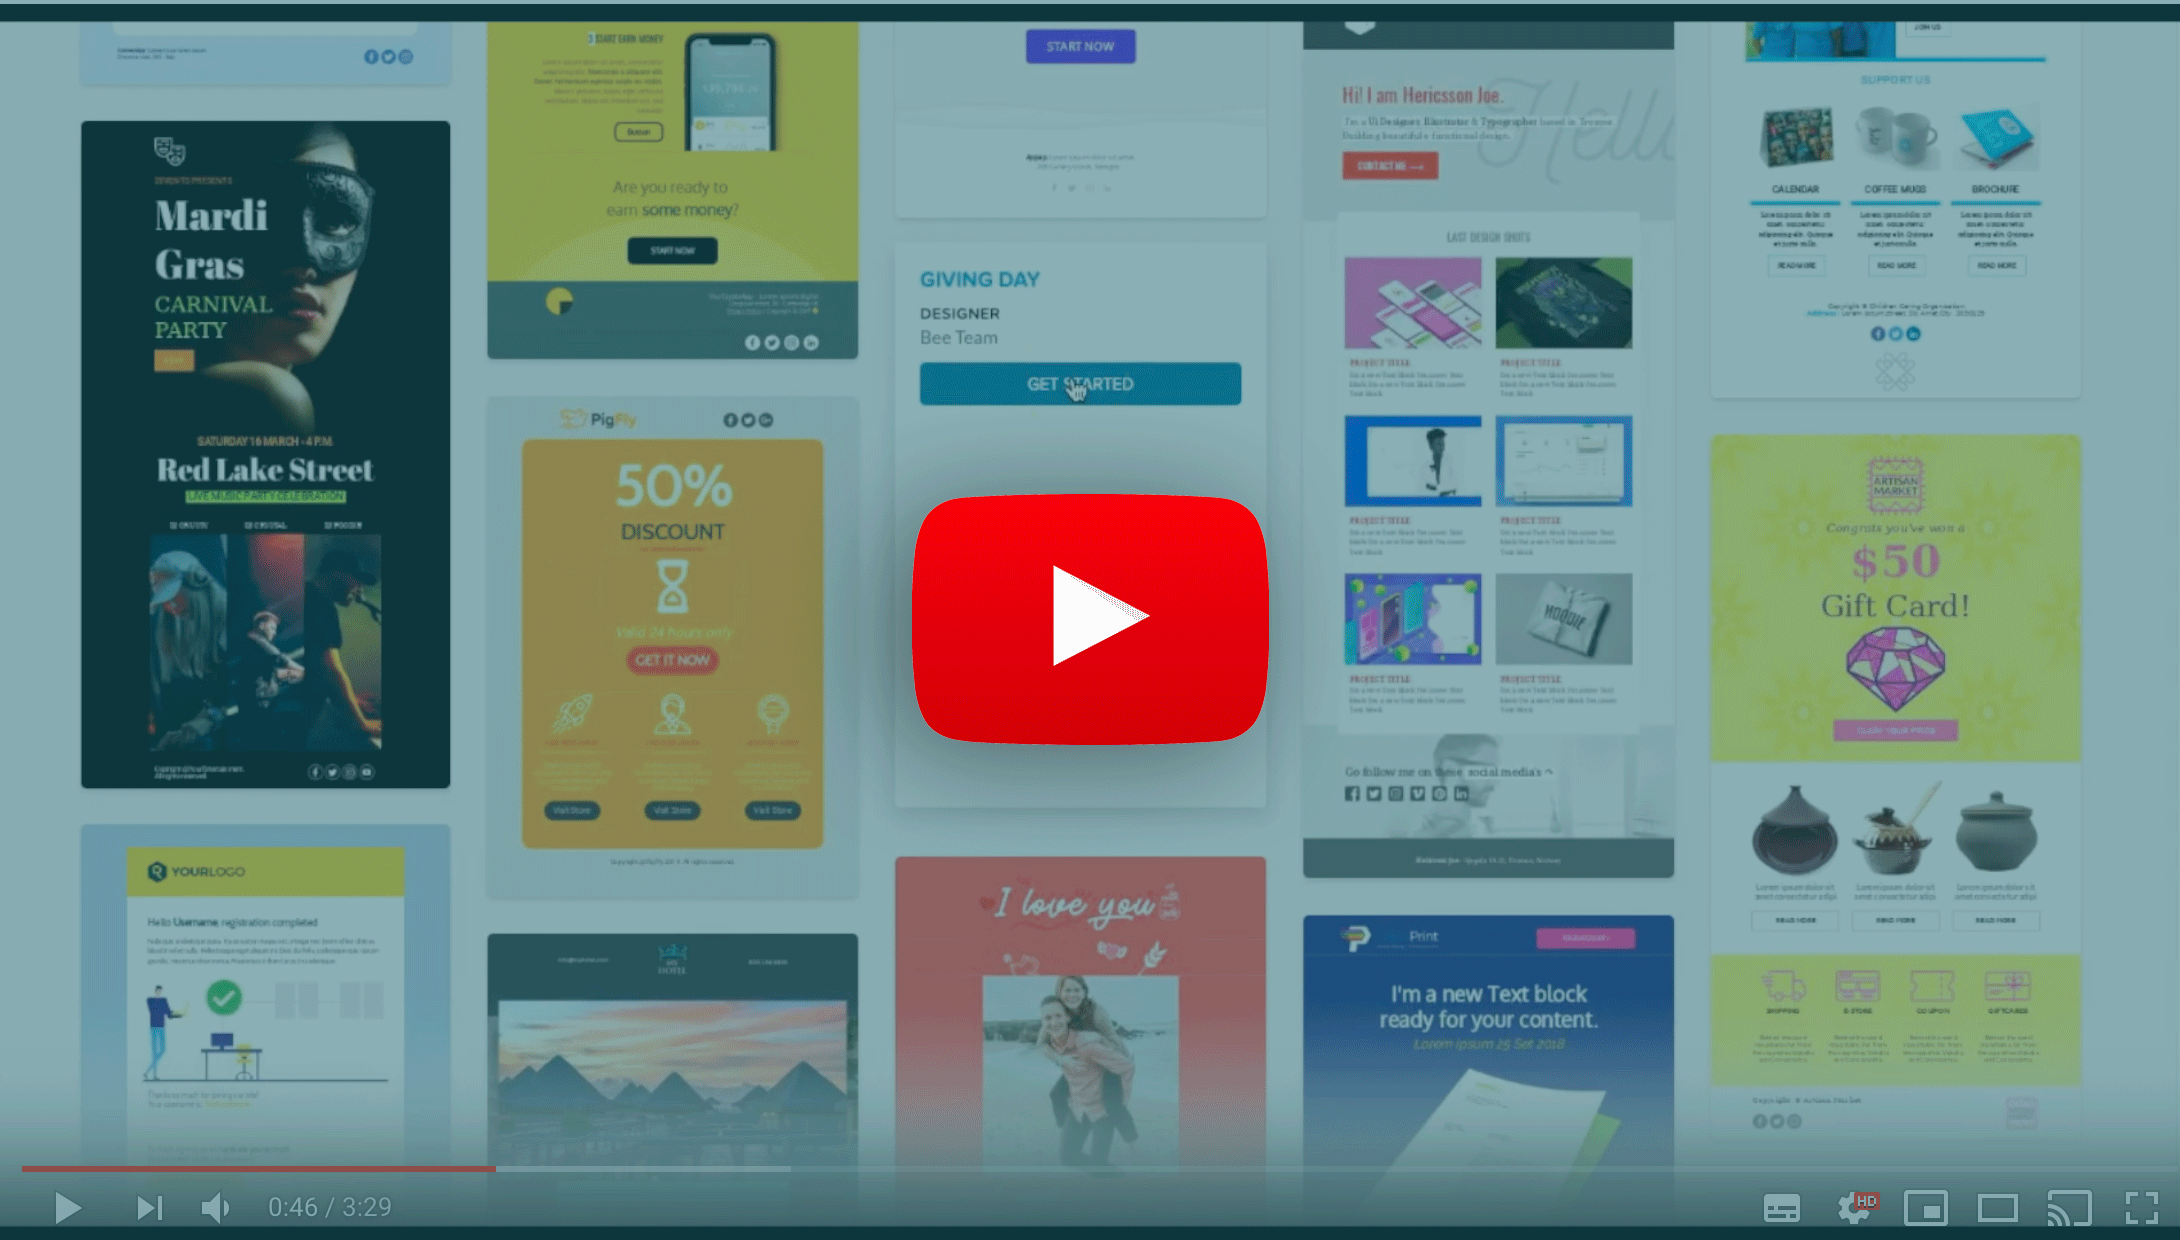
Email geeks, have you heard how easy it is to use BEE and Mailchimp together—for free? Thanks to BEE's exciting partnership with Mailchimp, you can now use our free HTML email templates and editor to build a gorgeous email, then upload it to Mailchimp to send to your audience. And since BEE has plenty of ready-to-use responsive email templates for you to customize, the design process is super quick and simple. Read on to see how it's done!And click here to watch our video tutorial:
Step 1: Design your email in BEE Free
First things first: Go to beefree.io/templatesto scan through more than 200 professional HTML templatesto get started. You don't need to register or log in to use the editor, and all the templates are free. (Check the "free" filter in the navigation bar). You can filter by industry, purpose/occasion, or search by tag to find the template that's perfect for you—from newsletter templatesto event promotion templates. Or of course you can just scroll and browse.

Whichever template you select, remember these are custom email templates, and you can completely customize thembefore sending them in Mailchimp. Add your own text and images; change the fonts and font sizes; update the CTA button color and size, and more. Not in the mood for a template? You can also start from scratch!Today we chose a Giving Monday template to get us started—
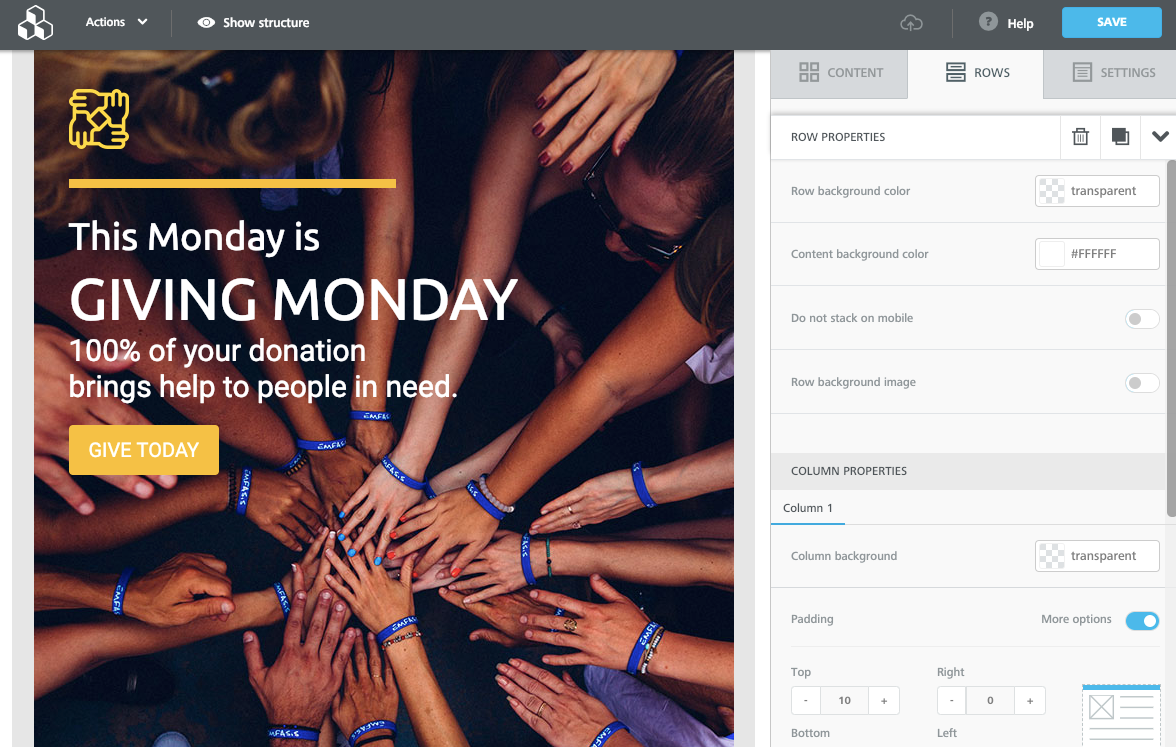
At minimum, we'll plan to update the body text and link the buttons and images.
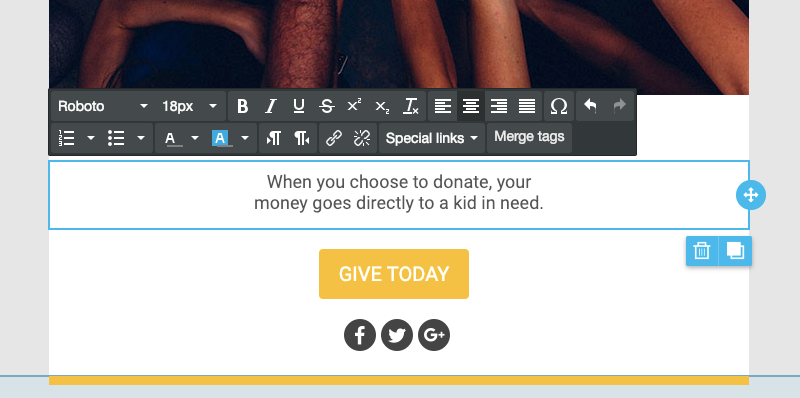
Remember to preview or test your email at any point using the Actions drop-down menu in the upper left. Once we're satisfied with our message, we can click the blue "Save" in the upper right corner. After saving, we're prompted to either download our email or edit and save it in BEE Pro. Today we'll stick with BEE Free and download it. (This downloaded zip file is exactly what we'll upload to Mailchimp!)

Psst: If you do want to try BEE Pro, you can start with a free trial to test out all the bells and whistles. BEE Pro lets you connect with Mailchimp directly, so you can "push" your email straight from the BEE editor to Mailchimp to send. It's another great easy option for email marketers and designers interested in Mailchimp email design.
Step 2: Upload your customized email to Mailchimp and send
With your beautiful email downloaded and at-the-ready, it's time to log into Mailchimp. Once you sign in, go ahead and create a new campaign.
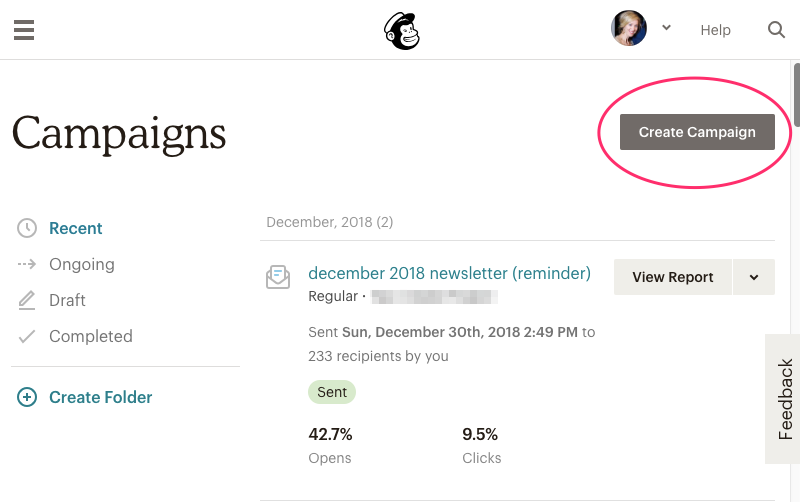
Choose email (duh).
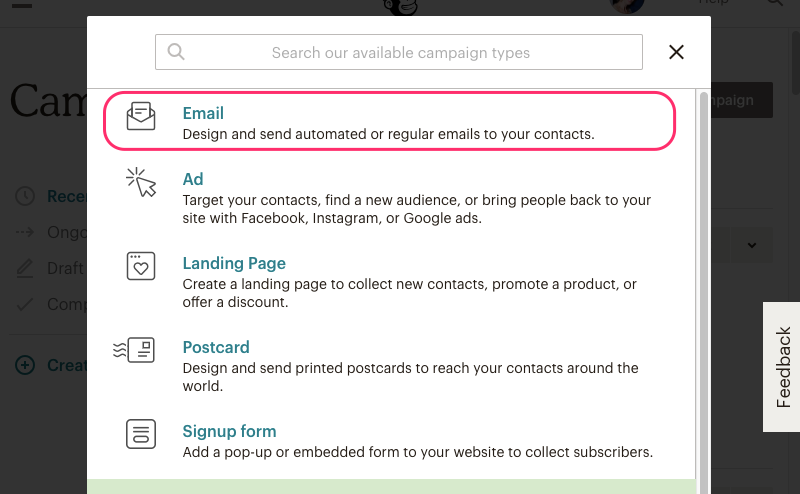
And then name your email campaign.
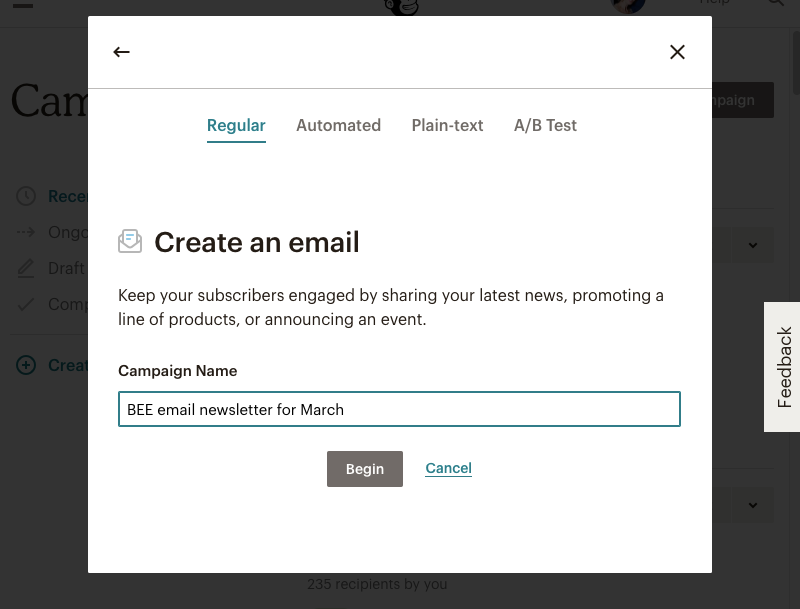
With your new campaign all set up, you can go ahead and customize your To, From, and Subject fields as usual. To upload your BEE email, click Design Email.
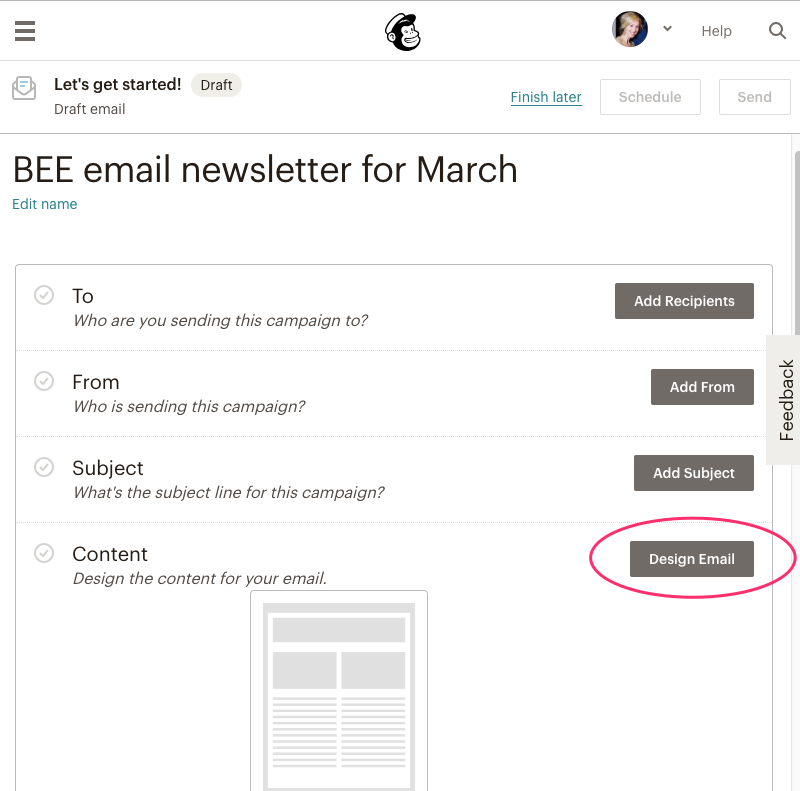
On the following screen, navigate from Layouts to Code your own. Under Code your own, you'll see options to paste in code, import from zip, or import from URL. Choose Import from zip.
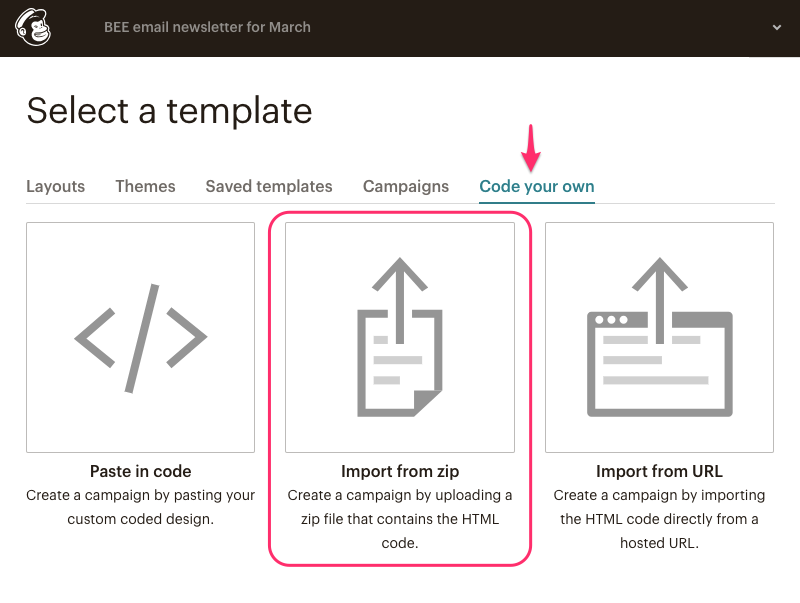
In the pop-up screen, go ahead and find the zip file you downloaded from BEE (hint: your email is inside ;)
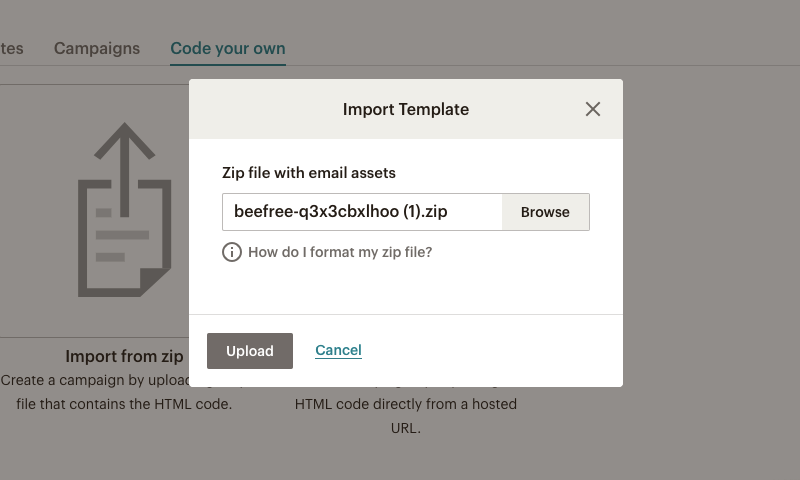
Once you click upload, voilá! You should see your BEE email appear.
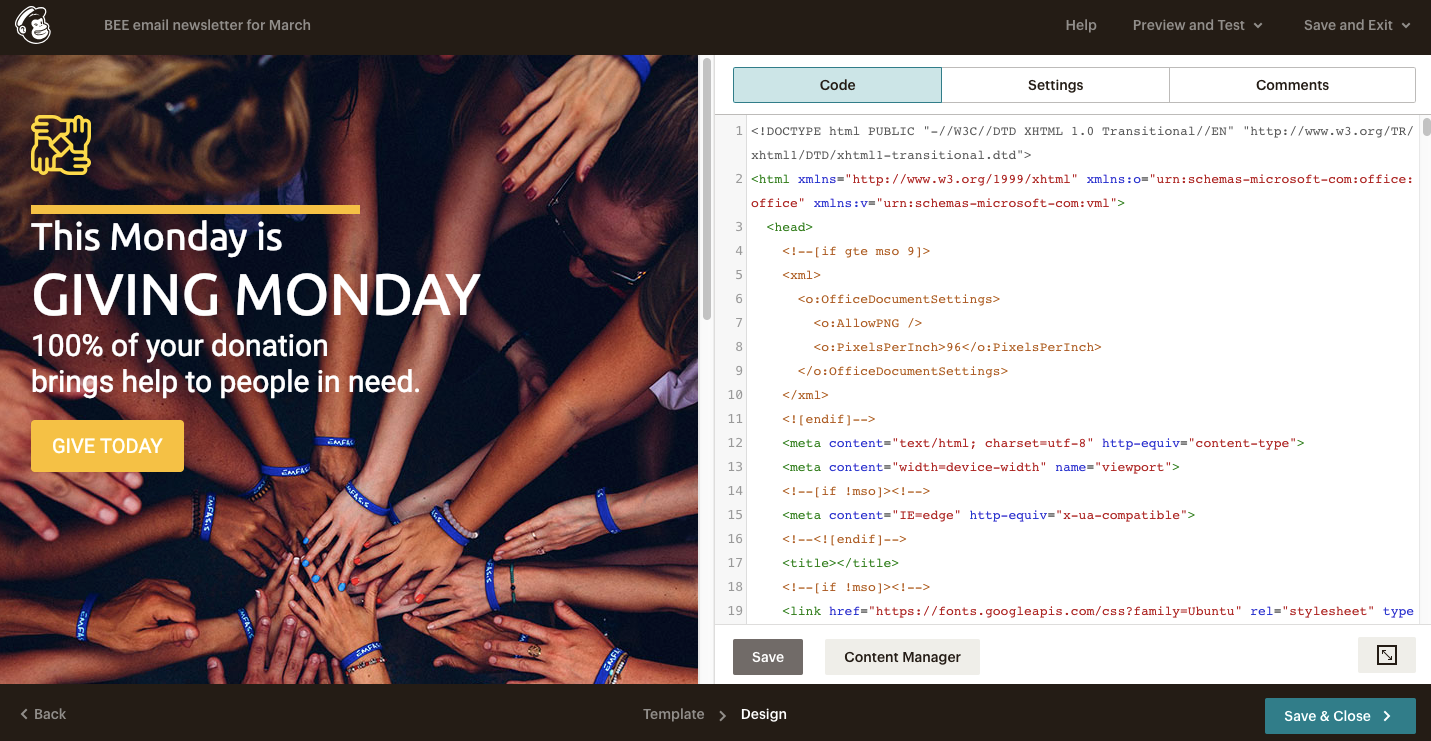
After you save and close your email, you can preview, send a test email, then schedule or send just as you would any other Mailchimp email. It's that easy.Lots of folks searching for Mailchimp email templates choose to use BEE to design their campaign, then Mailchimp to send it. Why? Because BEE offers users a unique level of design flexibility. The tool allows designers to customize their layouts precisely (e.g., switch from a single-column design to a 4-column design), adjust the padding on images, and so on. Designers like the control they get with the BEE editor, and now they can design in BEE and send in Mailchimp, one of the most popular email marketing platforms around. If you give this method a try, let us know how it goes! And happy designing.

Stay informed on all email trends
From the latest creative design strategies that inspire your next campaign to industry best practices and tech advancements, our newsletter is the go-to for all things creation.

